Edible Roses are a beautifully impressive (and tasty) idea for your holiday dessert table.
Super simple to make, needless to say, these Pastry & Fruit Roses are not your average Fruit “Roll-Ups”.

- 1 Apple (Red works best)
- 2 Nectarines (Purple looks the prettiest)
- 8 oz. Cream Cheese, softened & room temperature
- ½ cup White Sugar
- ½ cup Brown Sugar
- 2 sheets Puff Pastry, thawed
- 2 tsp. Cinnamon
- 4 tsp. Powdered Sugar
- All-Purpose Flour, as needed
- Butter, as needed
- Preheat the oven to 375F.
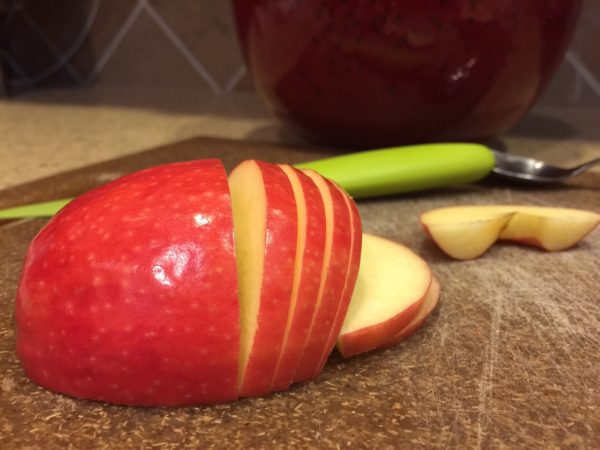
- Grease muffin tin (8 muffin spots) with Butter. Slice the Apples & Nectarines.
- Place Apple slices on a microwave-safe plate and microwave for 35 seconds so the Apples are pliable and softened.
- Roll out the Puff Pastry on a lightly flour-dusted cutting board and cut each sheet into 4 strips. You will have 8 strips in total.
- Spread Cream Cheese evenly on each strip. Next sprinkle with White Sugar & Brown Sugar.
- Alternate Apple & Nectarines slices in a row, slightly overlapping, along one long side of the strip. Fold the other side of the strip over the top of the fruit slices. Repeat for all 8 strips.
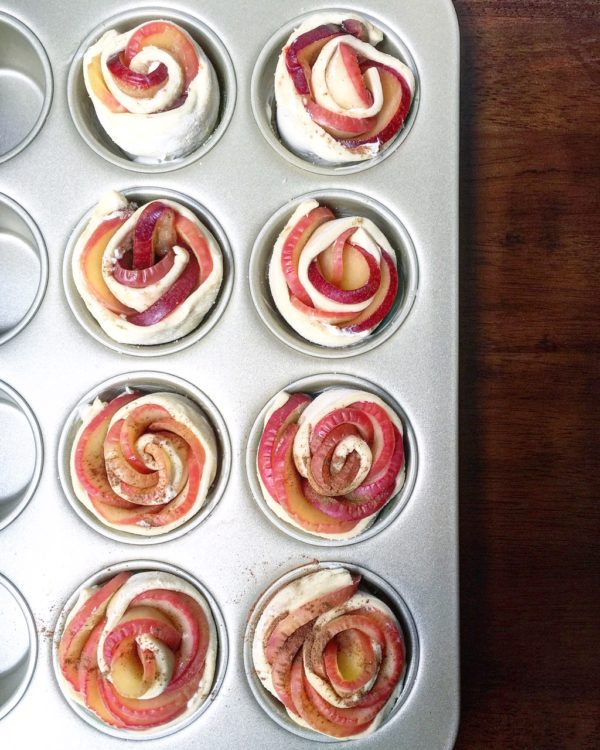
- Starting on one side, roll the puff pasty, keeping Apple & Nectarine slices in place, to create a rose-shaped pastry. Place in the greased muffin tin. Repeat to create all 8 roses.
- Sprinkle each rose with Cinnamon and bake for 30 minutes.
- At 30 minutes, loosely cover the roses with aluminum foil and bake for an additional 10-15 minutes.
- When the rose pastries are finished baking, sprinkle with Powdered Sugar. Remove from tin immediately so they don't overcook. Serve warm or cool before storing in an airtight container, in the refrigerator, for up to 3 days. If storing, bring back to room temperature or warm pastries before serving.
STEP BY STEP PHOTOS BELOW:
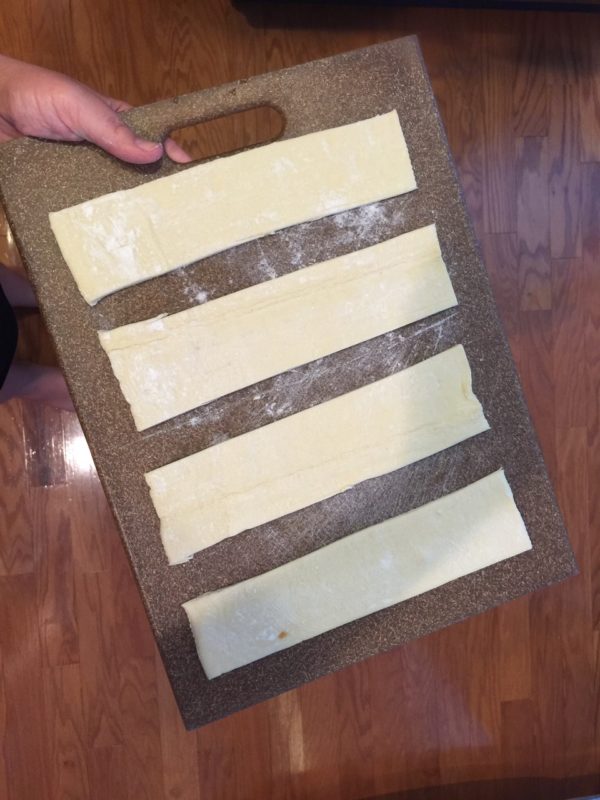
Roll out the Puff Pastry on a lightly flour-dusted cutting board and cut each sheet into 4 strips. You will have 8 strips in total.
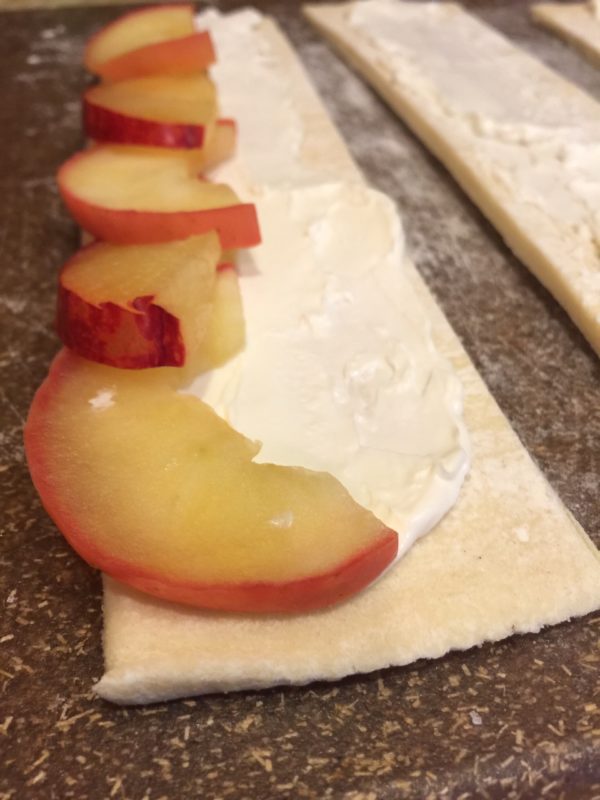
Spread Cream Cheese evenly on each strip. Next sprinkle with White Sugar & Brown Sugar.

Alternate Apple & Nectarines slices in a row, slightly overlapping, along one long side of the strip. Fold the other side of the strip over the top of the fruit slices. Repeat for all 8 strips.
Starting on one side, roll the puff pasty, keeping Apple & Nectarine slices in place, to create a rose-shaped pastry. Place in the greased muffin tin. Repeat to create all 8 roses.
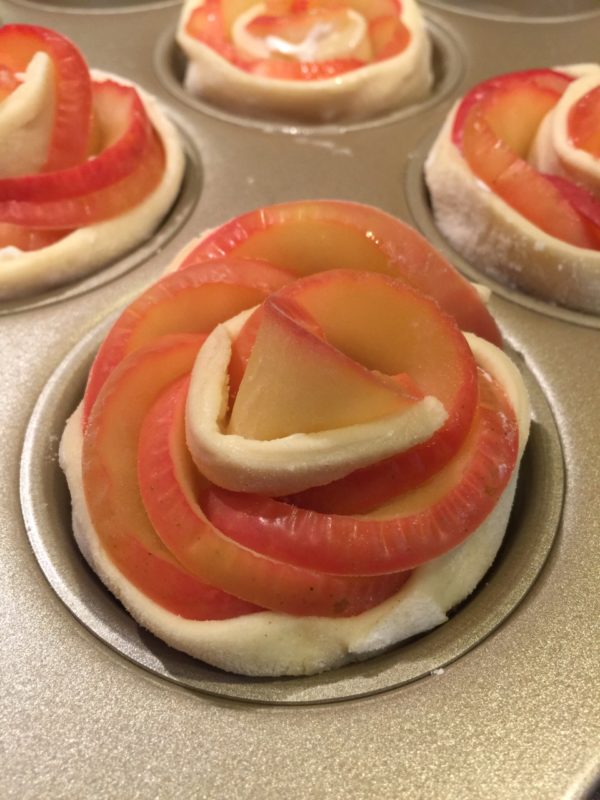
Sprinkle each rose with Cinnamon and bake for 30 minutes.
At 30 minutes, loosely cover the roses with aluminum foil and bake for an additional 10-15 minutes. (This step is optional, I find that if they bake the full 40-45 minutes uncovered, some of the fruit will sometimes get burnt.)

When the rose pastries are finished baking, sprinkle with Powdered Sugar. Remove from tin immediately so they don’t overcook. Serve warm or cool before storing in an airtight container, in the refrigerator, for up to 3 days. If storing, bring back to room temperature or warm pastries before serving.

Note: These pastries go especially well with after-dinner Coffee or breakfast the next morning.


Leave a Reply