• Skip to primary navigation
  • Skip to main content
  • Skip to primary sidebar
  • Skip to footer

Slice of Jess

Changing the way you eat, one slice at a time.

  • About
  • Press
  • Recipes
  • Travel & Dining
  • Collaborate
    • Collaborate
    • Recipe Development
    • Photography
    • MEDIA KIT
    • Privacy Policies
  • Contact Us

How to Make Air Fryer Chicken Wings in Instant Pot Vortex

January 30, 2020 By Jessica 18 Comments

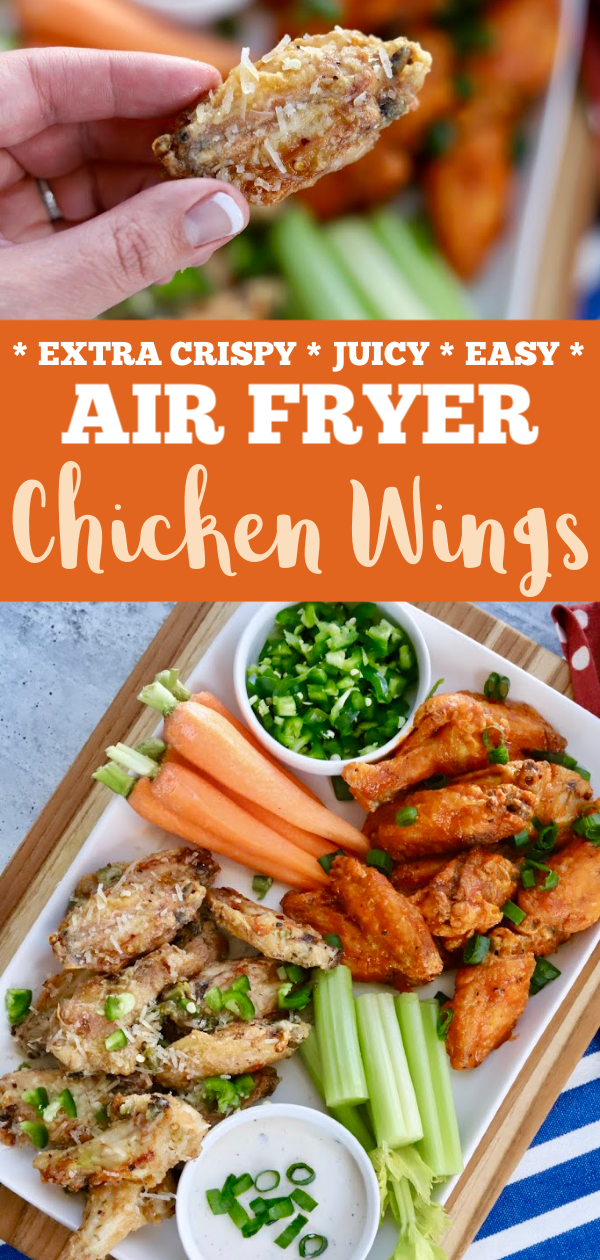
These Air Fryer Chicken Wings are amazingly crispy on the outside, juicy in the center. Simply serve with celery, carrots and your dipping sauce of choice!
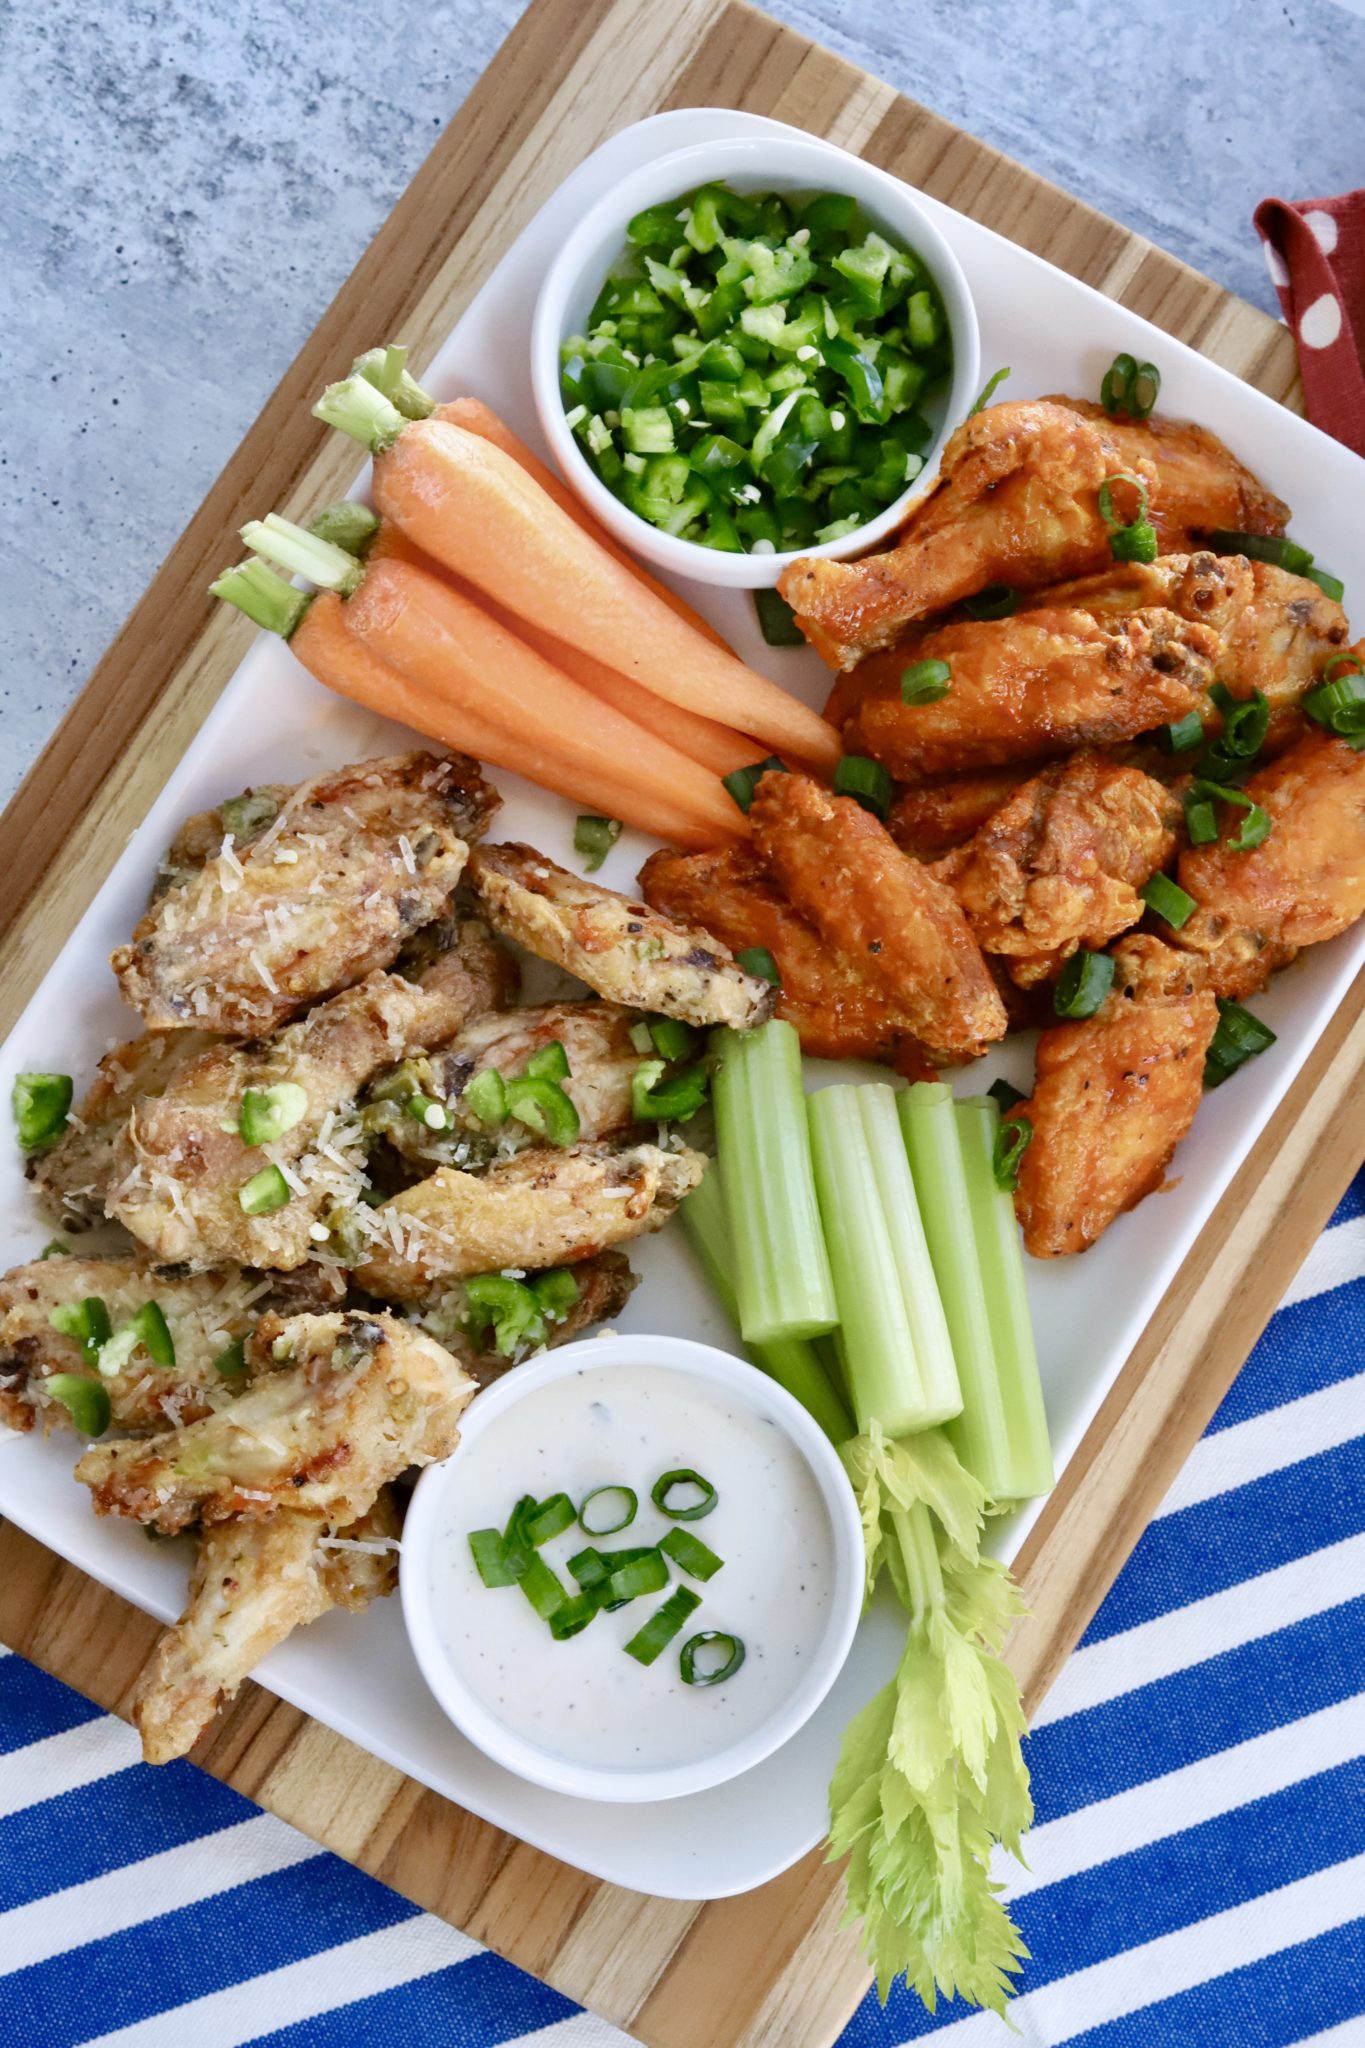
Air Fryer Chicken Wings

I recently purchased the 10 quart Instant Pot Vortex and it’s quickly become my favorite appliance. It bakes, it dehydrates, it broils, it roasts a whole chicken, and most importantly… it’s a double-decker AIR FRYER. How… who…..what is this magic? It’s a Christmas miracle (even though I purchased it after Christmas, lol).

OTHER AIR FRYER RECIPES YOU MIGHT LIKE:

Garlic Cheddar Air Fryer Drop Biscuits

Parmesan Air Fryer Fried Pickles

The Juiciest Air Fryer Fried Chicken Bites

How To Make Air Fryer Potato Wedges

The Ultimate Guide For Air Fryer Chickpeas

Sweet And Spicy Air Fryer Green Bean Fries

Pickle Juice Crispy Air Fryer Broccoli

Crunchy Gouda Air Fryer Eggplant Fries
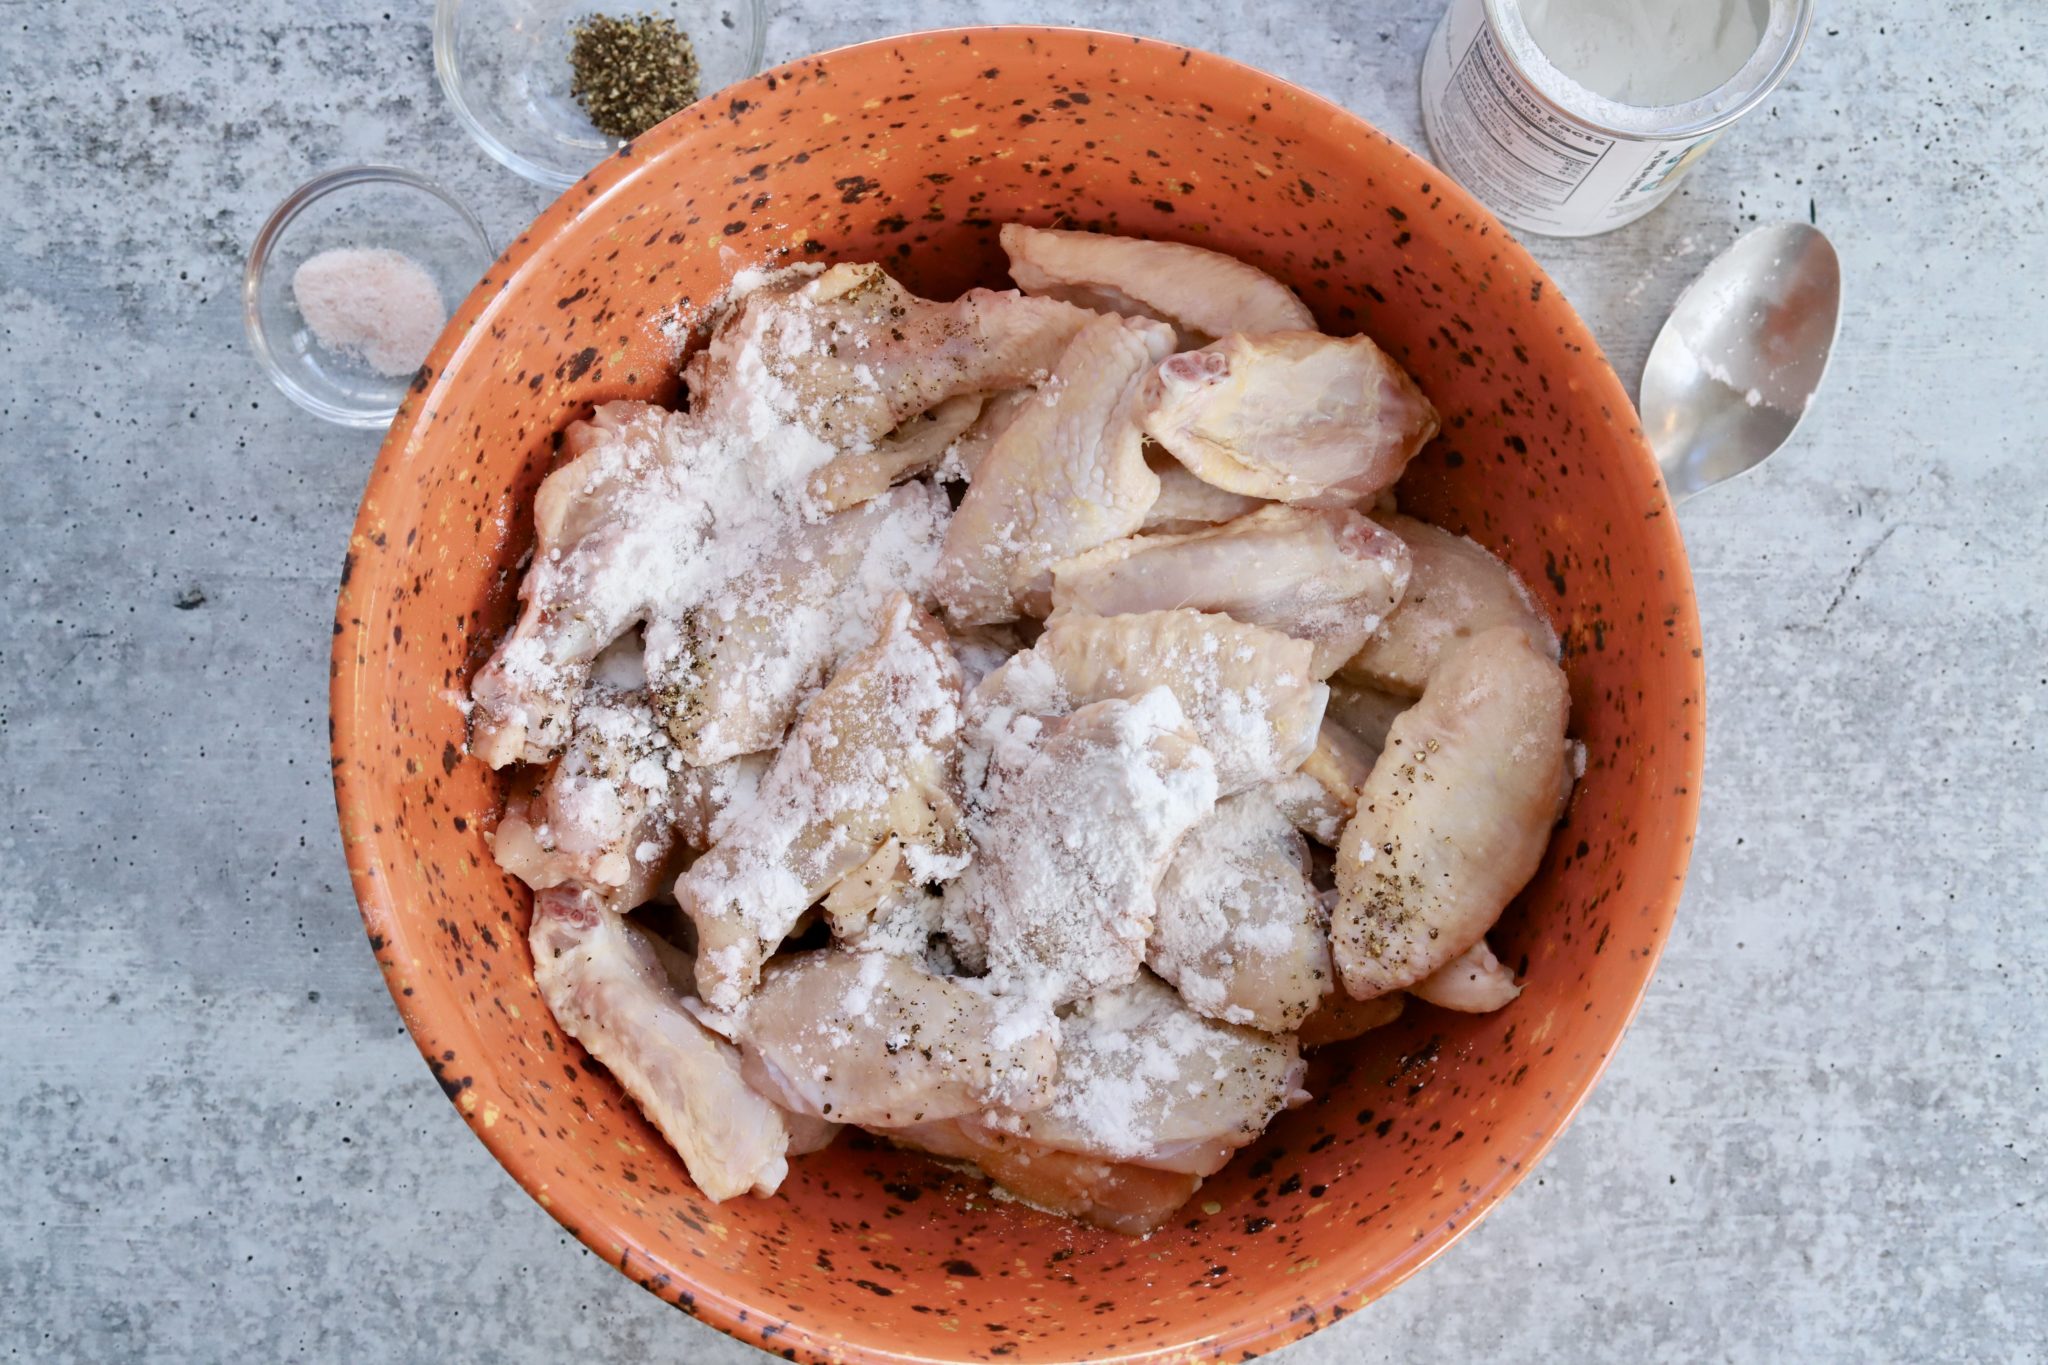
 

Air Fryer Chicken Wings

CRISPY AIR FRYER CHICKEN WINGS STEP 1: 

There are a couple of secrets when it comes to air frying extra crunchy chicken wings. First, make sure to pat each wing dry with a paper towel. Next, lightly dust the wings with a coating of baking powder, salt and pepper. Is the baking powder absolutely necessary? Well, no. But after testing the wings with and without… I prefer them with.
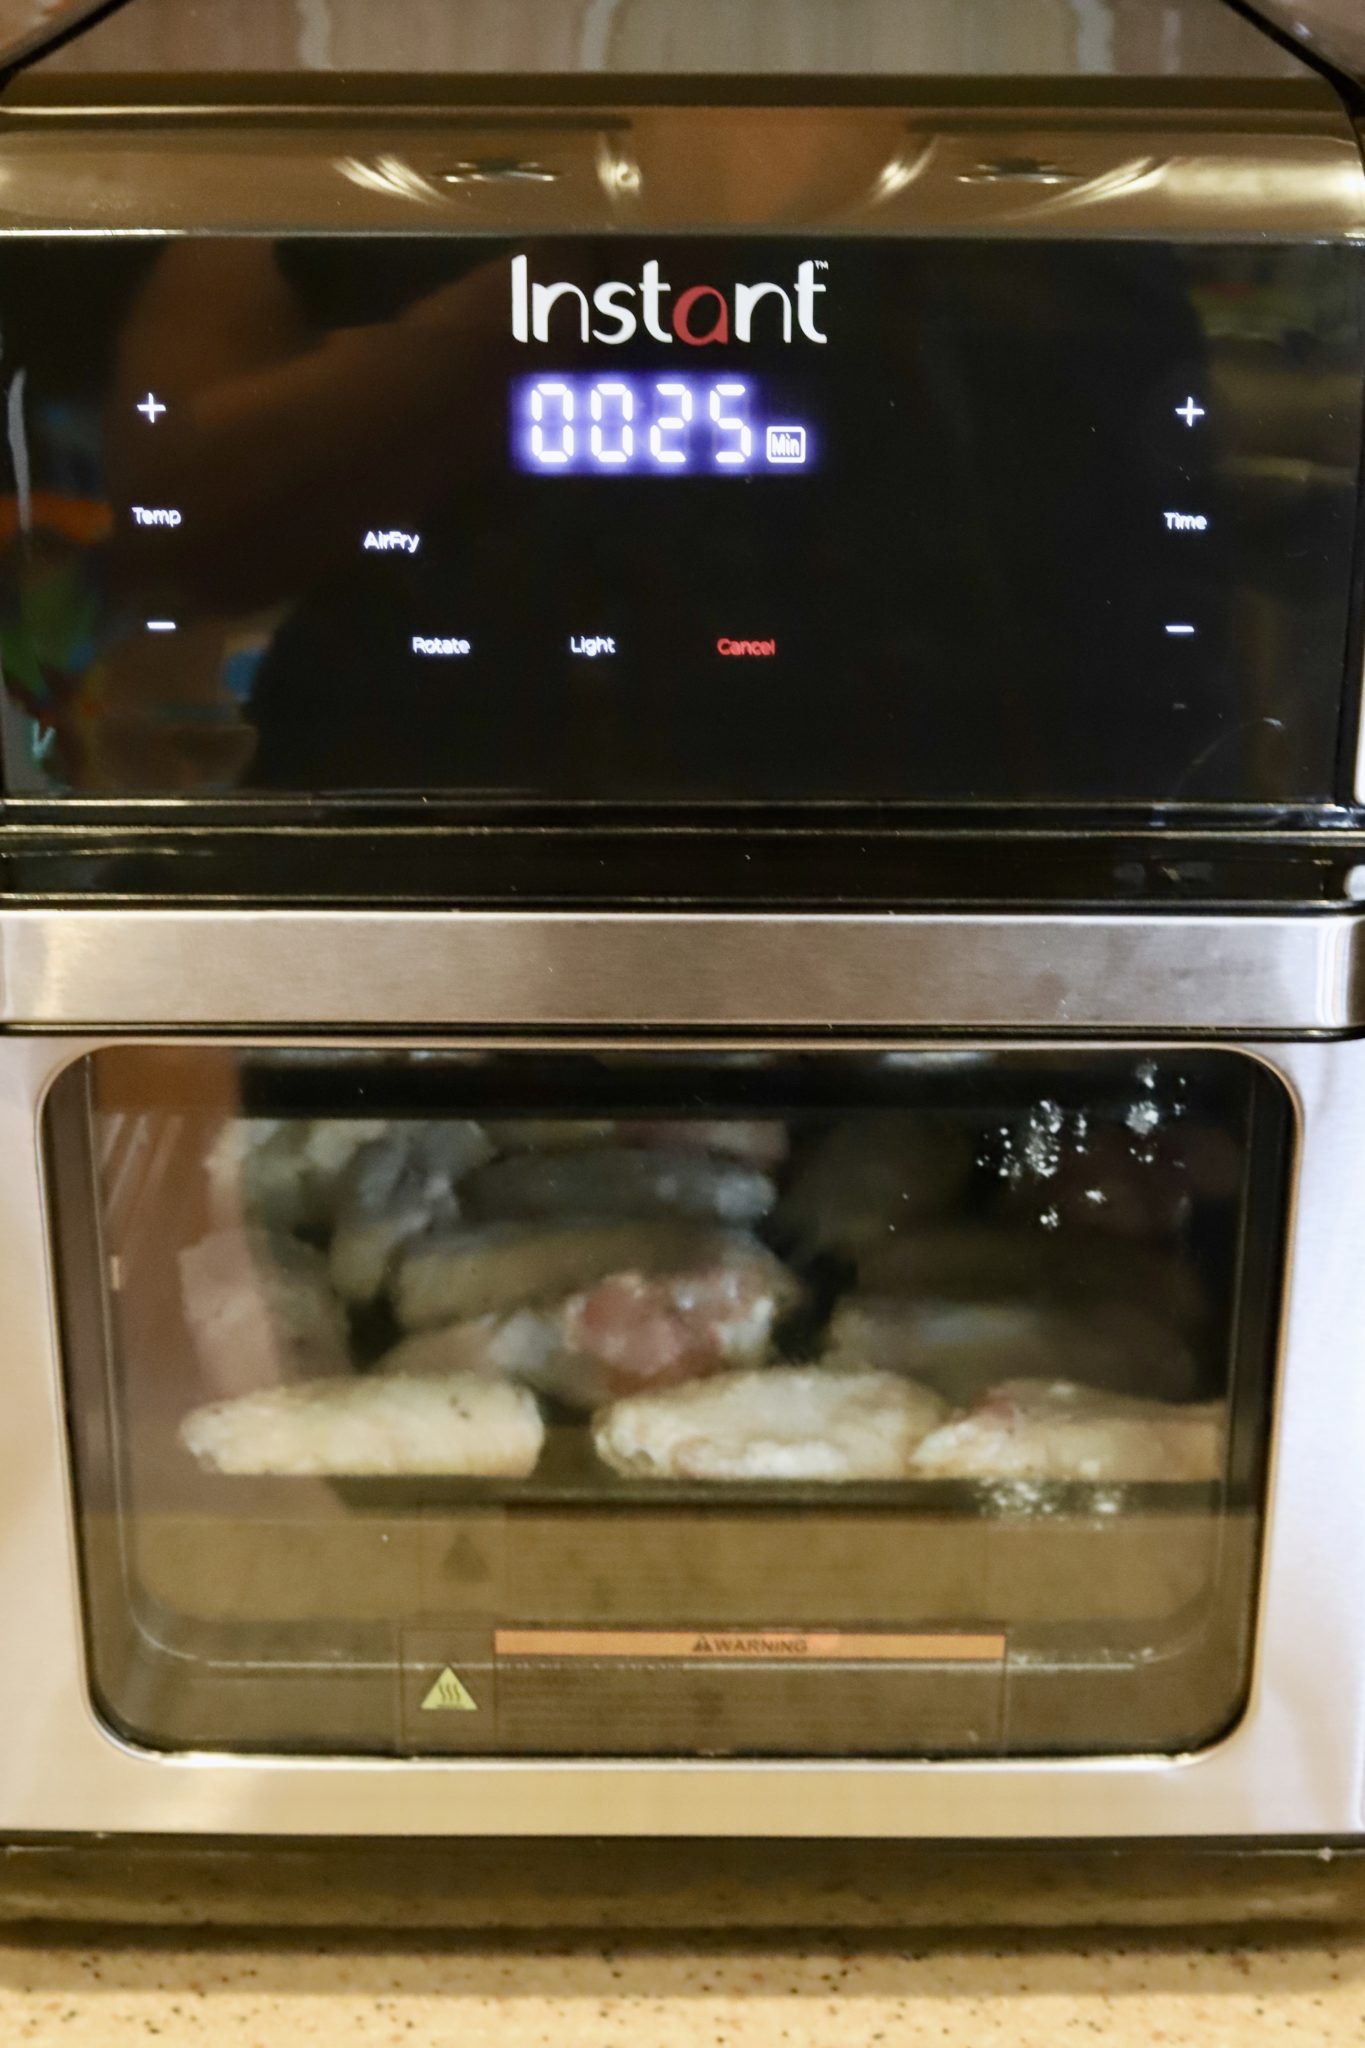
Air Fryer Chicken Wings

CRISPY AIR FRYER CHICKEN WINGS STEP 2:

Next you’ll place them in a single layer on both trays. Each tray holds around one-pound of wings. So depending on how many you are prepping, you may need to cook the wings in multiple batches. There’s no need to preheat the Vortex in advance, simply add the wings, crank it up to 380F and set the timer for 25 minutes.
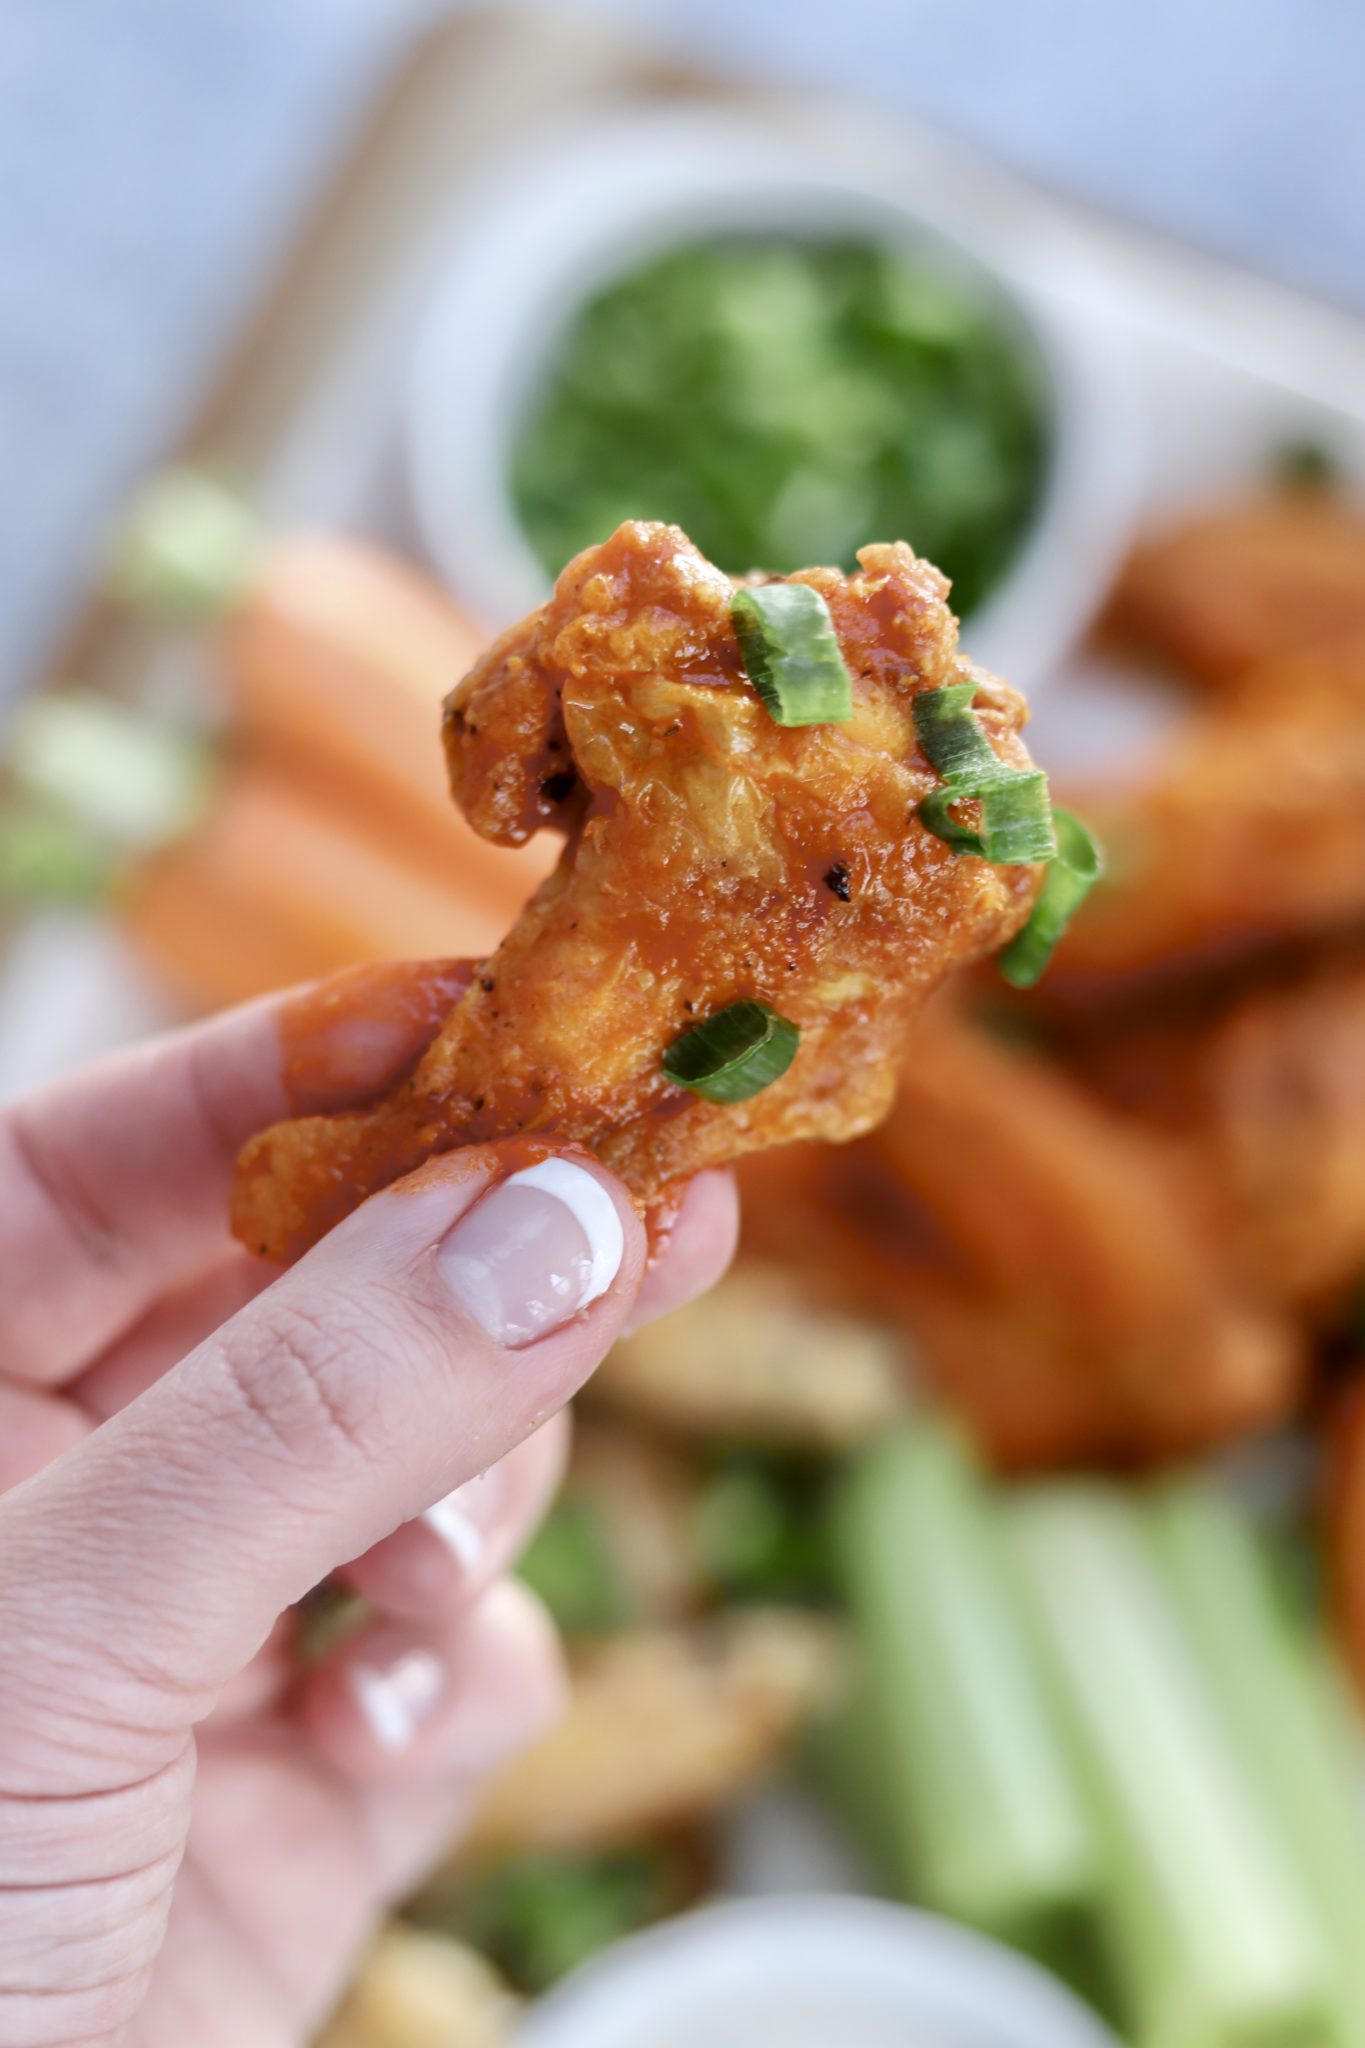
Air Fryer Chicken Wings

CRISPY AIR FRYER CHICKEN WINGS STEP 3:

While those bad boys are cooking, go ahead and decide what kind of sauce you’d like to serve them with. If you’re a fan of heat, try my brother-in-law’s extra spicy buffalo sauce. He prefers to grill his wings, but something tells me that once he tries them this way he’ll swoon for both options.
Air Fryer Chicken Wings

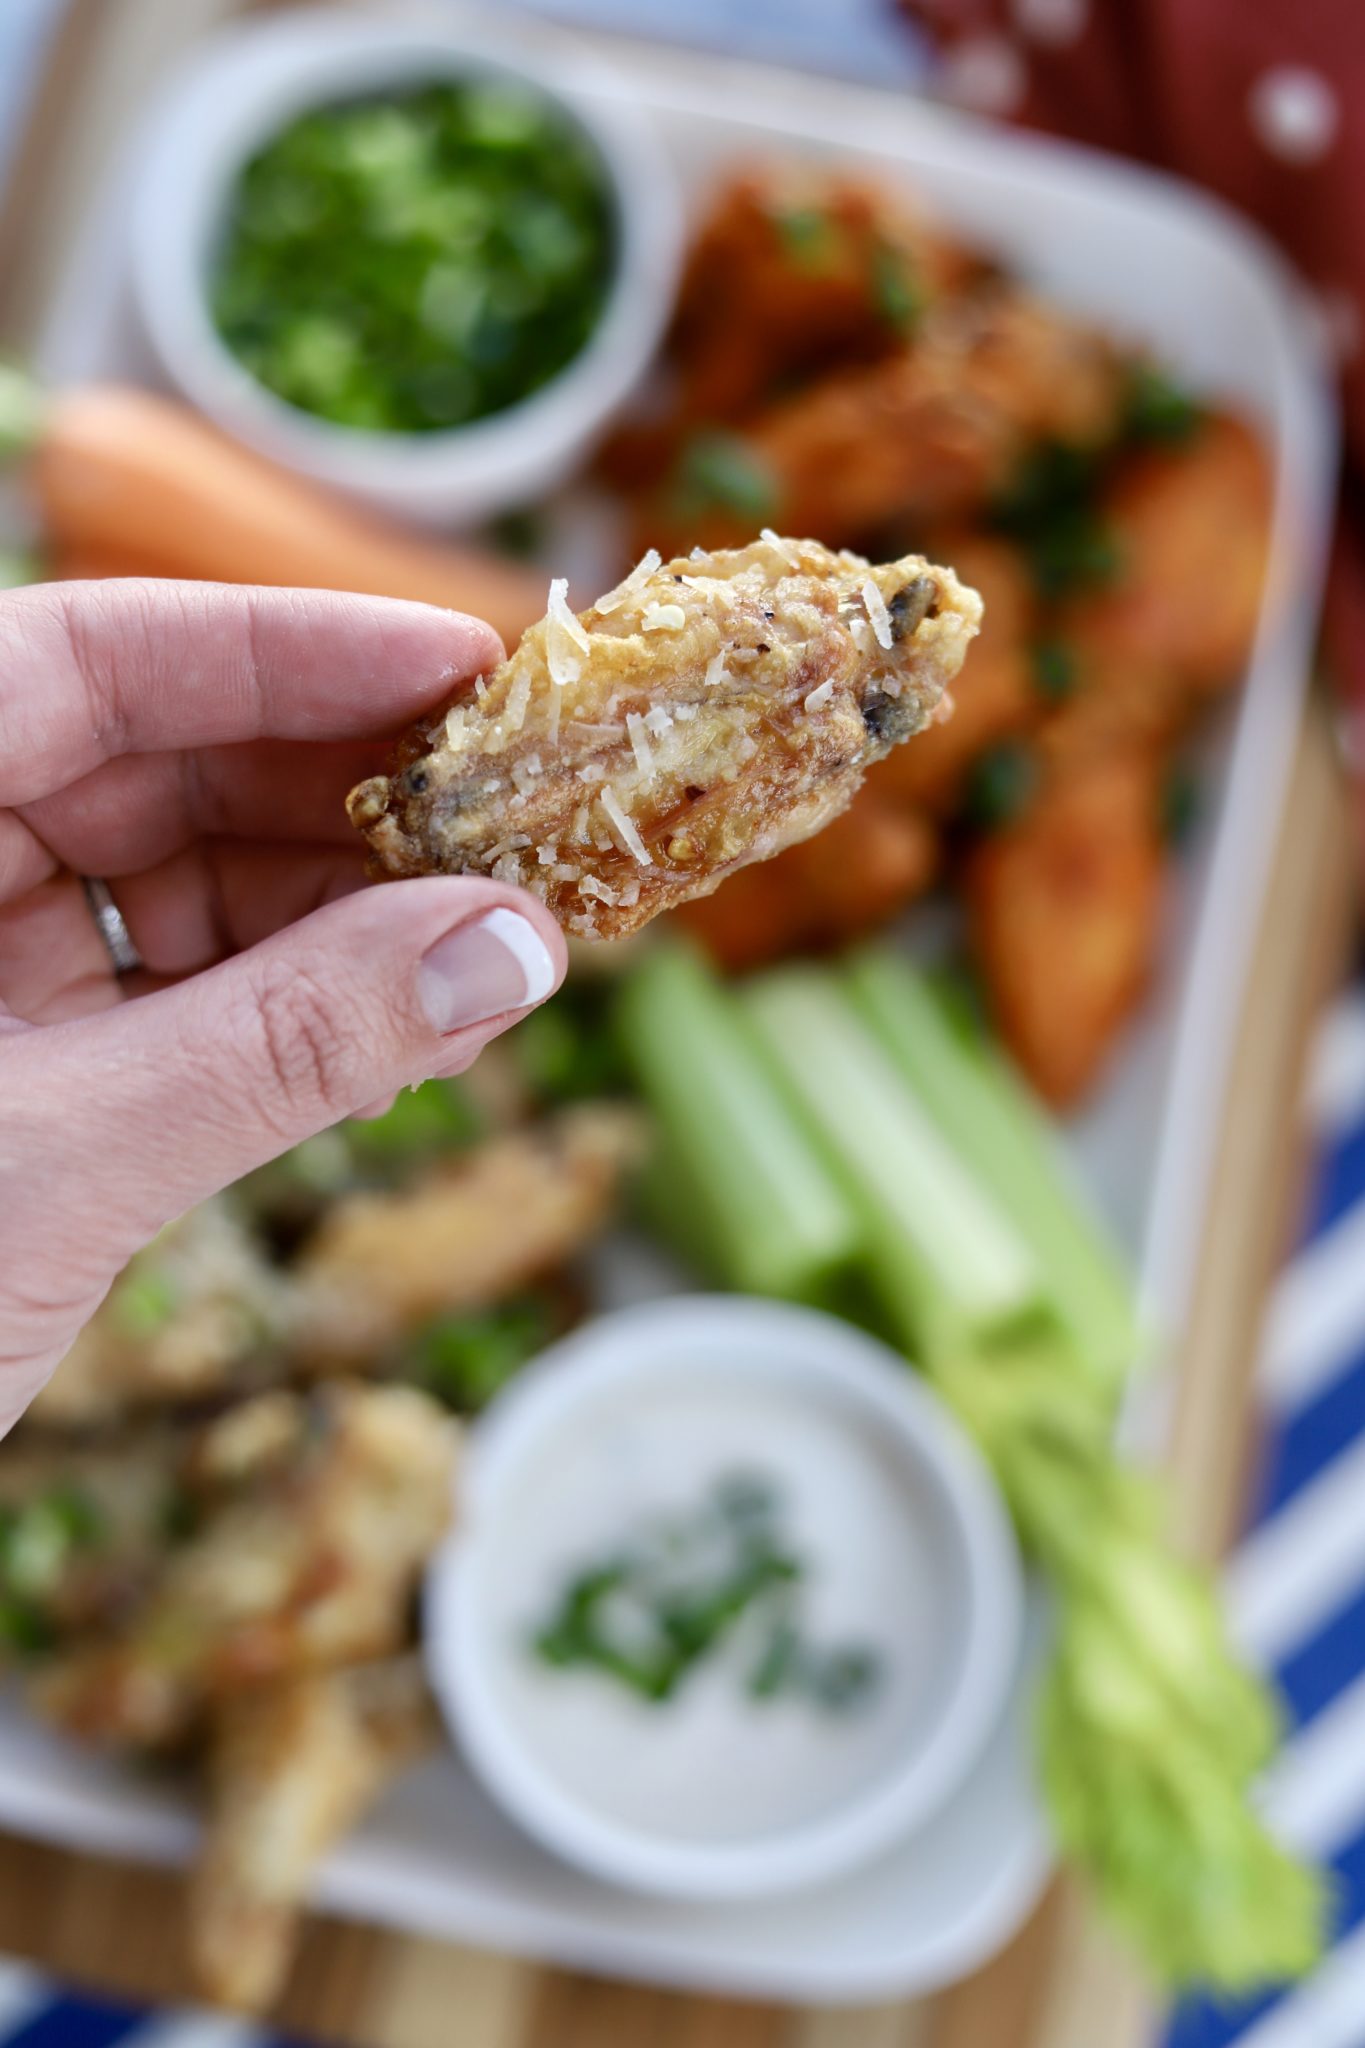
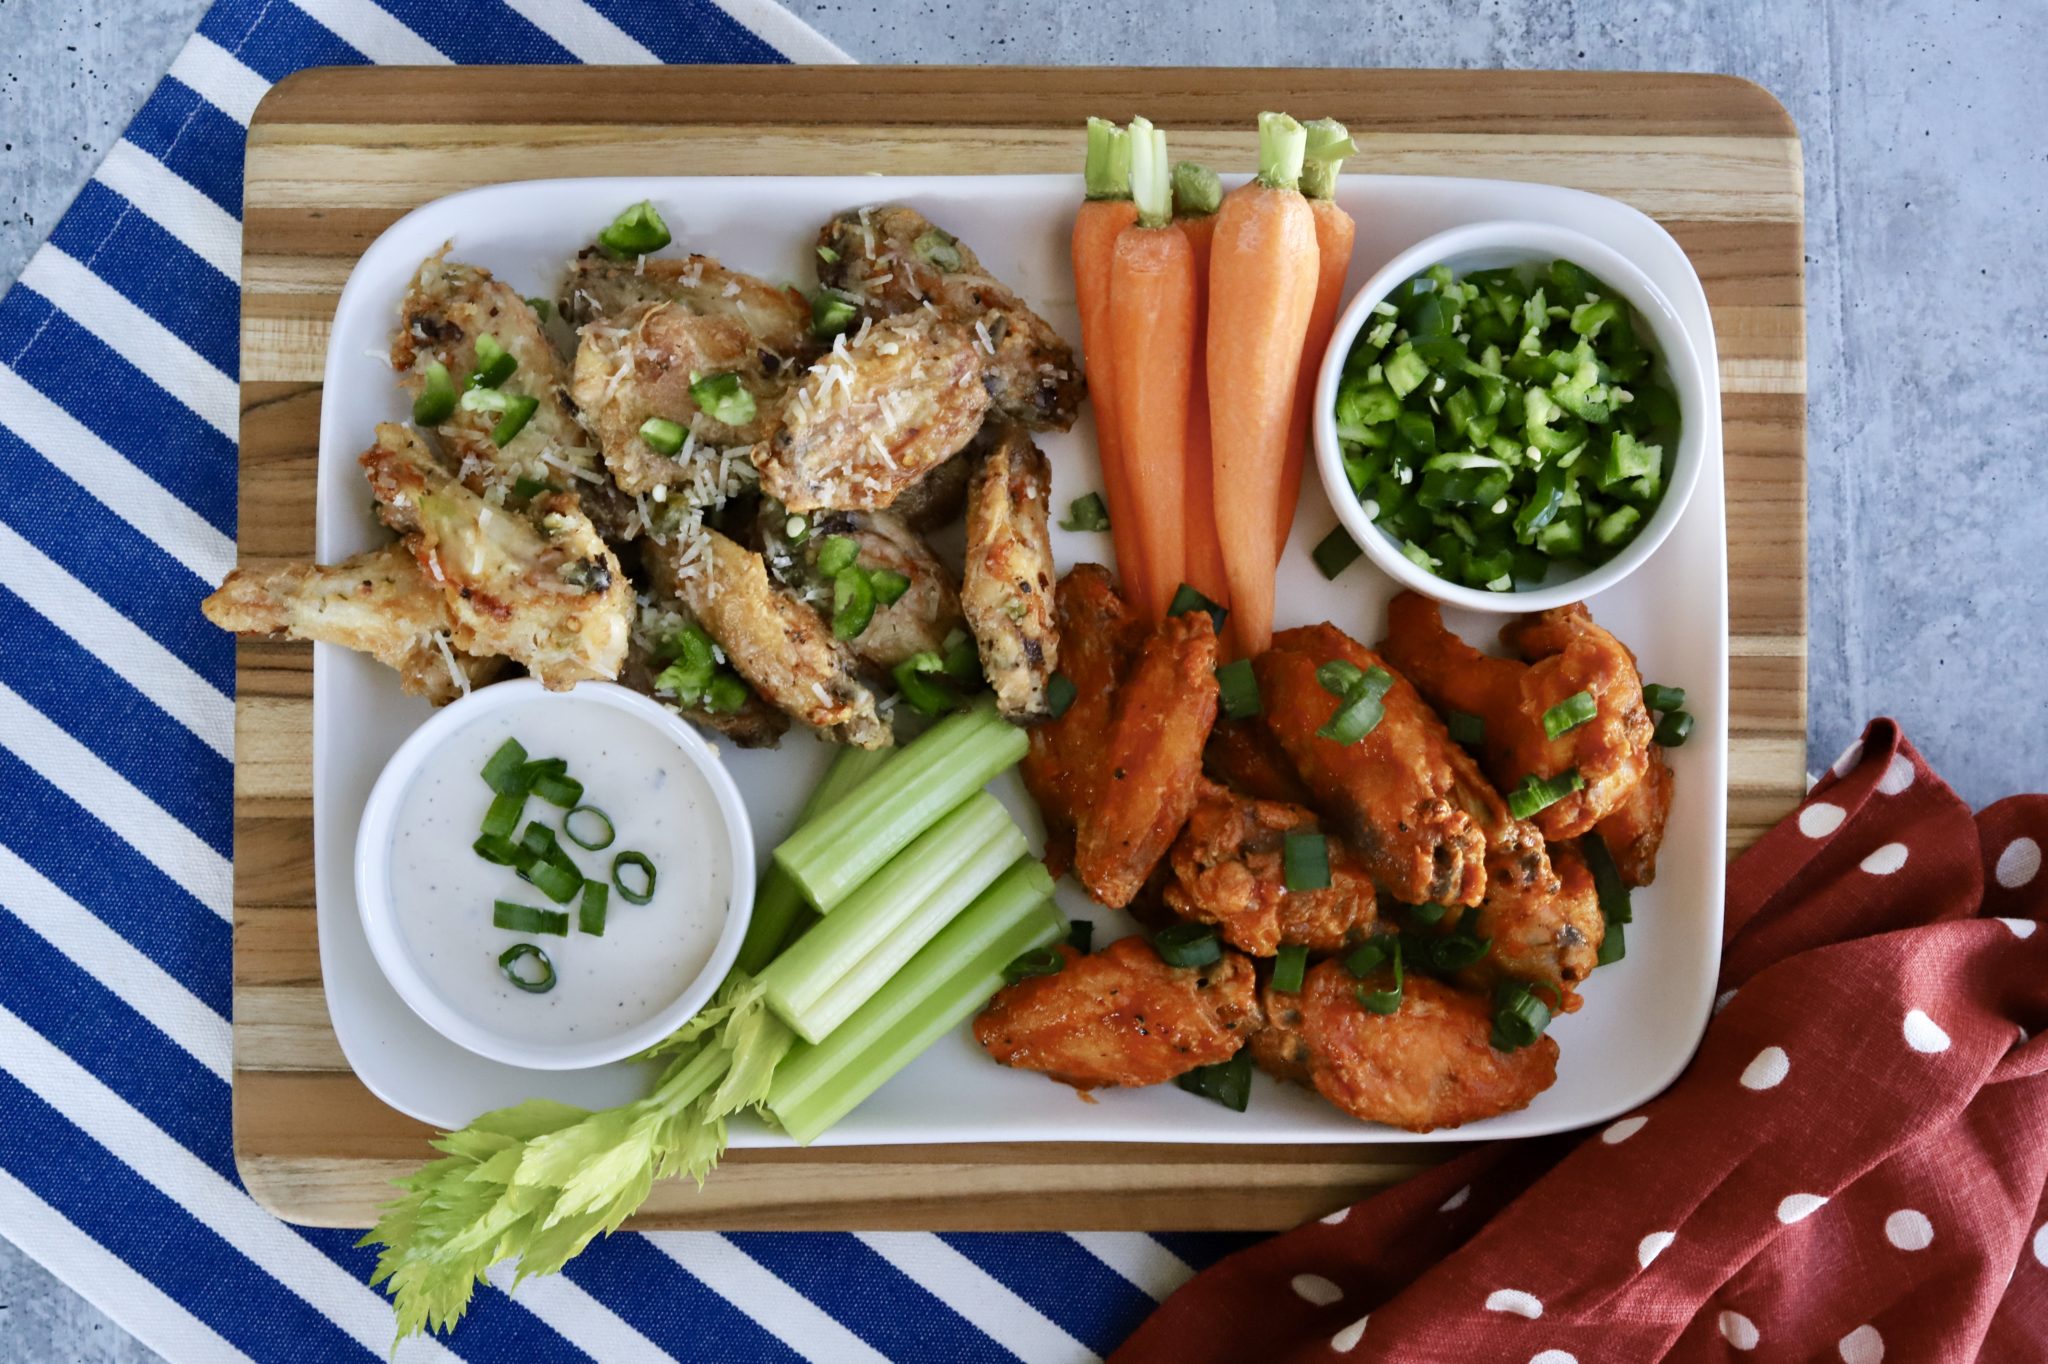
I had some extra parmesan on hand… so I thought I’d make a spicy, garlic-y, buttery sauce for half the wings. First I melted a stick of Minerva Dairy’s garlic butter in a small pot with 1 chopped jalapeño and 2 cloves of minced garlic. If you haven’t tried their butters yet, I definitely recommend that you should! If you’re using regular butter (and still want the extra garlic-y goodness), go ahead and add a couple more cloves of minced garlic to the pan. Bring the butter to a light simmer and then turn off the heat.

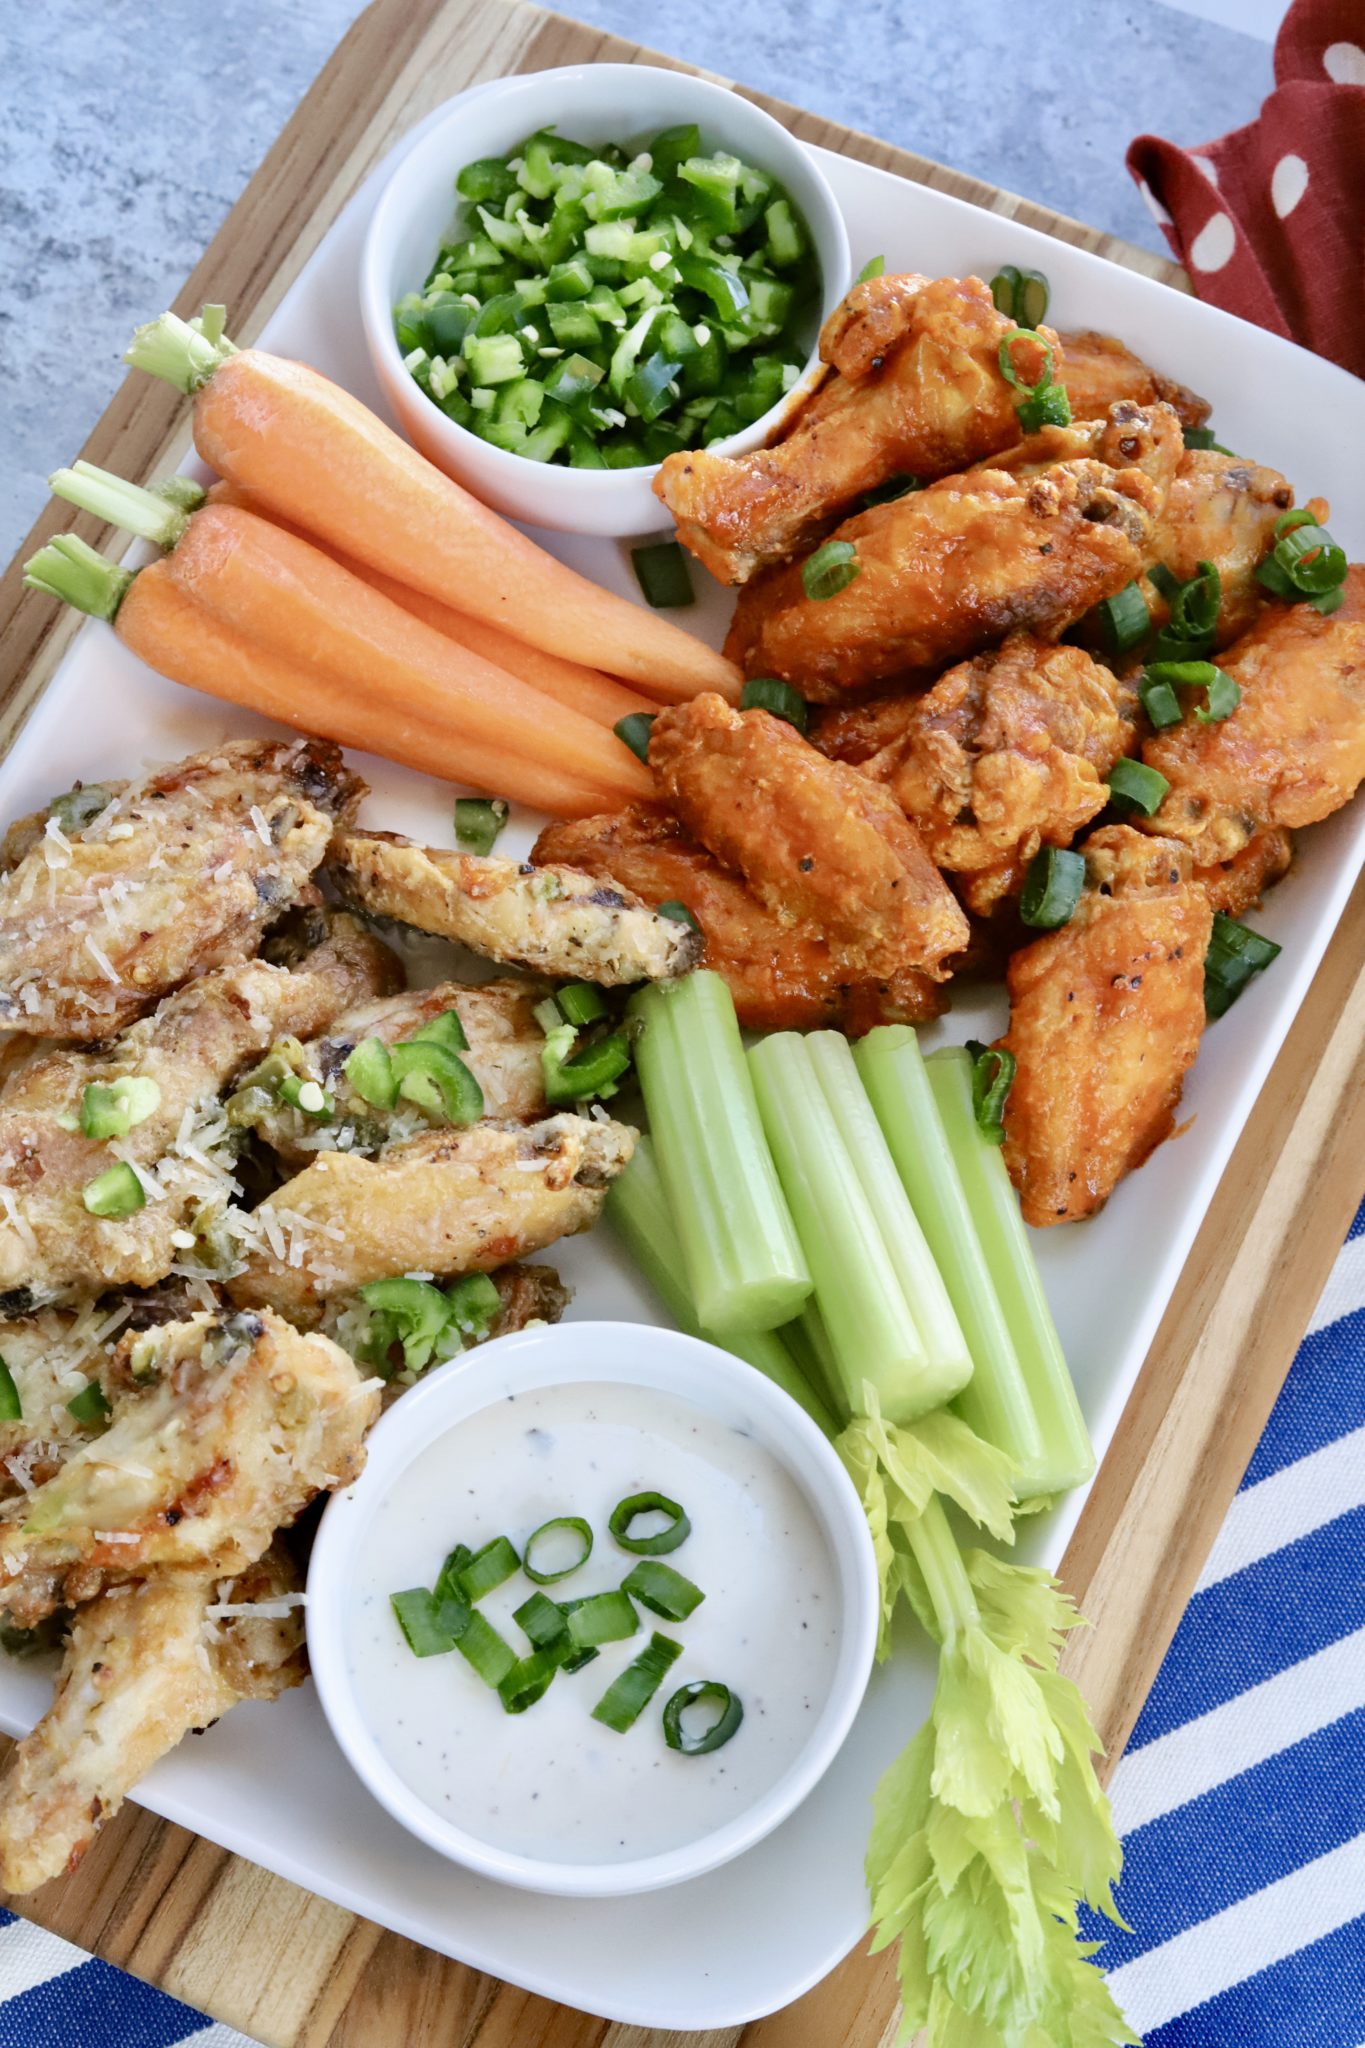
When the wings are ready, toss half in the spicy butter sauce and mix them together with fresh parmesan. BOOM, so good. Toss the other half with buffalo sauce and serve with freshly chopped green onions and jalapeños as a topping. Celery, carrots and a dipping sauce are never a bad idea either.

OTHER RECIPES YOU MIGHT LIKE:

Pickle Juice Fried Chicken Sandwich

Chicken Cobb Salad with Dill-Dijon Vinaigrette

Dutch Oven Pozole Verde with Chicken
Air Fryer Chicken Wings

5.0 from 1 reviews
How to Make Air Fryer Chicken Wings in Instant Pot Vortex
 
Print
Serves: 4
Ingredients
FOR THE AIR FRYER CHICKEN WINGS:
  • 2 lbs. Chicken Wings
  • Salt + Pepper, to taste
  • 1 tbsp. Baking Powder (optional)
FOR THE BUFFALO WING SAUCE:
  • 1 cup Frank's RedHot Sauce
  • 1 tbsp. Unsalted Butter
  • ½ Fresh Jalapeño, chopped
  • ½ tsp. Freshly Cracked Black Pepper
FOR THE SPICY GARLIC PARMESAN SAUCE:
  • ¼ cup Butter
  • 1 Jalapeño, chopped
  • 2 - 4 cloves Garlic, minced (per preference)
  • ½ tsp. Freshly Cracked Black Pepper
  • ½ cup Freshly Shredded Parmesan Cheese
FOR SERVING (to taste):
  • Green Onions, sliced
  • Jalapeños, chopped
  • Red Pepper Flakes
  • Celery
  • Carrots
  • Your Favorite Dipping Sauce
Instructions
  1. Pat chicken wings dry with a paper towel.
  2. Place them in a bowl and sprinkle with salt, pepper and optional baking powder.
  3. Set them in a single layer on the air fryer trays. Cook at 380F for 25 minutes, switching the trays halfway through.
  4. While the wings cook, make your desired sauce (or both!). To make the sauces, place all ingredients in a small pot and bring to a simmer. If making both sauces, use separate pots.
  5. Toss wings in sauce before serving. Enjoy!
3.5.3251

NOTES ON THIS RECIPE: 

  • If you are using an air fryer that has a basket: Follow the same directions, making sure to shake the basket halfway through. Depending on the size of the basket, you may have to do multiple batches.
  • I prefer to use an equal mix of drumettes and flats. If using the tips, keep an eye on them (as they may cook faster).
  • Try these with our Tangy Alabama White Sauce. We keep a jar of this in our fridge at all times (and have been told by fans that they’ve straight up licked the jar clean… it’s THAT good).
Air Fryer Chicken Wings


PIN THIS FOR LATER:


Air Fryer Chicken Wings

Filed Under: Appetizers & Sides, Chicken & Poultry

Previous Post: « Chicken Cobb Salad with Dill-Dijon Vinaigrette
Next Post: Habanero Avocado Instant Pot Chicken Sandwich »

Reader Interactions

Did you make this recipe?

Tag @sliceofjess on Instagram & hashtag #sliceofjess.

Share this...
Share on facebook
Facebook
Share on pinterest
Pinterest
Share on twitter
Twitter
Share on linkedin
Linkedin

Comments

  1. Dana McCurdy

    January 30, 2020 at 8:24 am

    I got an air fryer last yer for Christmas and i love it too.

    I have done wings before and they always turn out nice and crispy.

    Thanks for sharing your wing sauce recipe because I am always looking to try some new flavors.

    Reply
    • Jessica

      January 30, 2020 at 9:37 am

      Goodness, I’m completely hooked! Glad you enjoyed the recipe, can’t wait for you to try it!

      Reply
  2. Neil B

    March 17, 2020 at 9:44 pm

    If making only about 1 lb of wings, do you suggest any changes to the time/temperature/tray placement? My wife and I are light eaters 🙂

    Reply
    • Jessica

      March 19, 2020 at 3:55 pm

      Hey Neil! Good question! It should still be the same time and temperature if you are using the Instant Pot Vortex, you’ll still divide them evenly among the two trays. However, if you are using a different air fryer, make sure to shake the tray halfway through (and times / temps may vary slightly). Can’t wait to hear what you think! We LOVE them here at our house. Thanks for stopping by my little corner of the internet! 🙂

      Reply
      • Neil B

        March 21, 2020 at 4:38 pm

        Hi Jess! I ended up making these before reading your suggestion to still split up the wings between two trays. I placed them all on one tray, in the center, and they were still delicious! Crunchy on the outside and juicy in the inside. Next time I’ll try splitting them up.

        Thanks again for sharing! My search for the perfect Instant Pot Vortex wing recipe is finally over 🙂

        Looking forward to trying even more recipes I could easily make in the Vortex.

        Reply
        • Jessica

          March 23, 2020 at 11:46 am

          Hey Neil, glad to hear the recipe works all on one tray! I’ll make sure to add more Instant Pot Vortex recipes in the near future. 🙂 If you have time, please sign up for my mailing list. That way you’ll see the new recipes when they come out. Have a great day!

          Reply
  3. Anais Montenegro

    May 17, 2020 at 12:11 am

    Can you start with frozen wings ? Or do I have to defrost

    Reply
    • Jessica

      May 20, 2020 at 2:50 pm

      I haven’t tried this with frozen yet, so I would recommend thawing them before cooking. Hope you enjoy this recipe as much as we do!

      Reply
  4. Dominique Goodwin

    June 10, 2020 at 7:54 pm

    I have the instant pot vortex but the 1 with the basket. Do you recommend same temp & time?

    Reply
    • Jessica

      June 13, 2020 at 2:16 pm

      The temp and time should be the same, but you may have to work in batches… depending on the size of your basket. I’d also recommend flipping them halfway through to make sure they cook evenly. 🙂

      Reply
  5. Jill

    February 5, 2021 at 9:06 pm

    Can you use the rotisserie basket to make wings?
    Also, how many uses does it take until the chemical/plastic smell goes away?
    Thank you.

    Reply
    • Jessica

      February 8, 2021 at 2:58 pm

      You can definitely try the rotisserie basket, although your cooking times may vary. Just make sure the internal temperature has reached 165F before consuming. My oven didn’t come with a chemical smell, I’d give yours a good clean before using. Thanks for stopping by and checking out my recipe!

      Reply
  6. Sandra

    April 30, 2021 at 3:16 pm

    Should I use the Bake or Airfry setting?

    Reply
    • Jessica

      May 1, 2021 at 10:44 am

      I use the air fryer setting but I’m sure the bake option would work as well!

      Reply
  7. Rosa

    July 5, 2022 at 4:40 pm

    What if I want to just make regular fried wings ? Can I use flower ?

    Reply
    • Jessica

      July 18, 2022 at 10:37 am

      Are you using this recipe for the sauces only? You can certainly fry your wings coated in flour and then toss together with the sauce afterwards. 🙂

      Reply
  8. Jessica

    September 19, 2022 at 5:38 pm

    I just got an air fryer last night for the sole purpose of making wings. I didn’t know where to start, but Google brought me here! They turned out perfectly. I used a pre made sauce though because I’m on a lemon pepper kick right now.

    Reply
    • Jessica

      September 22, 2022 at 6:22 pm

      Hooray! Lemon Pepper sounds amazing. Enjoy your new air fryer! I use mine almost every day.

      Reply

Leave a Reply Cancel reply

Your email address will not be published. Required fields are marked *

Rate this recipe:  

Primary Sidebar

Hey there, Jess here. Welcome to a slice of my kitchen! Here you'll find tidbits of my everyday life, home cooked meals and travel guides. Thanks for stopping by!

Join Our Email List!

Recent Posts

  • Skillet Gochujang Chicken Thighs May 23, 2023
  • Scratch-Made Air Fryer Chicken Nuggets May 16, 2023
  • Crispy Sushi Rice with Sunny Eggs May 10, 2023
  • Homemade Focaccia Bread Recipe May 5, 2023
  • How To Make Spanish Rice At Home May 1, 2023

Check Out My Insta :)

sliceofjess

🏡: San Francisco ➡️ Charlotte, NC
📬: Inquiries: Jess@SliceOfJess.com
⤵️: 100’s of Killer Home Cookin’ Meals

Jess Bentley | Recipe Gal
Absolutely loving these Gochujang Chicken Thighs f Absolutely loving these Gochujang Chicken Thighs for summer.
.
BLOG —> https://sliceofjess.com/skillet-gochujang-chicken-thighs/
.
FOR THE CHICKEN MARINADE:
3 tbsp. Gochujang
3 tbsp. Brown Sugar
2 Garlic Cloves, minced
2 tbsp. Liquid Aminos
1 tbsp. Toasted Sesame Oil
1 tsp. Rice Vinegar
1 tsp. Onion Powder
1 tsp. Paprika
¼ tsp. Salt
2 lb. @smfchicken Chicken Thighs
1 tbsp. Butter
.
FOR GARNISH:
1 tbsp. Chopped Fresh Cilantro + Stems if desired
1 tsp. White Sesame Seeds
Fresh Jalapeño Slices, optional
.
DIRECTIONS:
1. Combine all the ingredients for the chicken marinade in a large Ziplog bag. Massage to combine and allow to marinate in the refrigerator for at least 30 minutes. This can also be marinated overnight.
3. Heat a cast iron skillet over medium-high heat. Remove the chicken thighs from the marinade, and shake off any excess sauce. Allow the butter to melt in the skillet and then add the chicken.
3. Cook the chicken for 10 - 15 minutes, making sure to flip halfway through. Be sure to check that the internal temperature is 165F before removing from heat.
4. Set the chicken on a cutting board or plate to rest for at least 5 minutes. Afterwards, slice and enjoy immediately.
#mysmfchicken #smfpartner
Have you ever made your own chicken nuggets at hom Have you ever made your own chicken nuggets at home? It couldn’t be simpler! Grab some ground @smfchicken, mix with pantry staples, and pop those babies in the air fryer. So fresh, so crunchy, so satisfying.
.
BLOG —> https://sliceofjess.com/scratch-made-air-fryer-chicken-nuggets/
.
INGREDIENTS:
1 Bread Slice
3 tbsp. Heavy Cream
1 tsp. Garlic Powder
2 tsp. Dried Minced Onion
1 tsp. Paprika
2 tsp. Salt
1 lb. @smfchicken Ground Chicken
1 Egg
1 cup Crushed Cornflakes
¼ cup Grated Parmesan
3 tbsp. Melted Butter
Fresh Parsley, optional for garnish
.
DIRECTIONS:
1. Preheat air fryer to 400F.
2. Add the bread, heavy cream, garlic powder, dried minced onion, paprika, and 1 teaspoon of salt to a large mixing bowl. Allow to soak for 1 - 2 minutes, or until the bread has absorbed the liquid.
3. Gently combine the soaked bread with the ground chicken.
4. Crush the cornflakes and mix together with the parmesan cheese in a large bowl. Whisk the egg in a separate bowl and set aside.
5. Form the chicken into nuggets and coat with the egg first, then the cornflake mixture.
6. Place the nuggets in the air fryer and brush the top of each one with melted butter. Air fry at 400F for 8 - 10 minutes, flipping halfway through. Nuggets are done when internal temp is 165F.
7. Garnish with fresh parsley, if desired, and serve with your preferred dipping sauce.
.
#mySMFchicken #SMFpartner
Do you see the rice dancing in the skillet? Crispy Do you see the rice dancing in the skillet? Crispy Sushi Rice is one of my favorite things! Crunchy, chewy, sweet, and savory. All the things!
.
BLOG —> https://sliceofjess.com/crispy-sushi-rice-with-sunny-eggs/
.
INGREDIENTS:
1 tbsp. Toasted Sesame Oil
1 cup Leftover Sushi Rice
2 Eggs
1 tbsp. Gochujang Hot Sauce (or favorite hot sauce)
2 tbsp. Sliced Scallions
½ Fresh Jalapeño, sliced
2 tsp. White Sesame Seeds
Salt, to taste
*See notes on how to make Sushi Rice in the blog
.
DIRECTIONS:
1. Pour the sesame oil in a large skillet over medium-high heat. Add the rice and stir to coat.
2. Let the rice to sit, unstirred, for 4 - 5 minutes to allow it to crisp on the bottom. Then toss and create two wells for the eggs.
3. Crack the eggs into the wells and cover for 2 - 3 minutes, or until the whites are set but the yolks are still runny.
4. Top with gochujang hot sauce, scallions, jalapeño slices, sesame seeds, and a touch of salt. Enjoy immediately.
It’s officially salad season! Here’s an oldie It’s officially salad season! Here’s an oldie but goodie… give my Spicy Chickpea Cucumber version a try.
.
BLOG —> https://sliceofjess.com/spicy-chickpea-cucumber-salad-recipe/
.
INGREDIENTS:
1 can Chickpeas, drained & rinsed
½ Large English Cucumber, thinly sliced
1 Fresh Jalapeño, seeded & sliced
½ small Red Onion, thinly sliced
1 clove Garlic, minced
2 tbsp. minced Fresh Cilantro
2 tbsp. chopped Fresh Dill
3 tbsp. Olive Oil
2 tbsp. White Wine Vinegar
½ tsp. Paprika
½ tsp. Cayenne
1 tsp. Kosher Salt
¼ tsp. Freshly Cracked Black Pepper
Pinch of Chili Flakes, optional garnish
(See blog for Pita Chips recipe)
.
DIRECTIONS:
1. Toss all ingredients in a large mixing bowl until well combined.
2. Refrigerate for at least an hour to let flavors blend.
3. Garnish with additional cilantro, dill and red pepper flakes, if desired before serving.
4. Store leftovers in a sealed container, refrigerated, for up to 3 days.
Heart me a delicious and easy Focaccia recipe. I d Heart me a delicious and easy Focaccia recipe. I don’t bake very often these days, but this sheet pan masterpiece might change that fact.
.
BLOG —> https://sliceofjess.com/homemade-focaccia-bread-recipe/
.
INGREDIENTS:
1¾ Warm Water
1 package Active Dry Yeast
1 tbsp. Maple Syrup
5 cups Bread Flour
2 tbsp. Course Sea Salt
1 cup Extra Virgin Olive Oil
1 tbsp. Chopped Rosemary
1 tbsp. Chopped Thyme
.
DIRECTIONS:
1. Whisk together the warm water, yeast, and maple syrup in a bowl. Set aside at room temperature for 15 minutes.
2. Add the flour, 1 tablespoon of course sea salt, ½ cup olive oil, and the yeast mixture to a stand alone mixer (KitchenAid) fitted with a dough hook. Mix on a low speed until a dough forms, about 5 minutes. Scrape down the sides, if needed.
3. Lightly coat a large mixing bowl with olive oil. Transfer the dough and cover with plastic wrap. Set the bowl in a warm place for 1 hour. The dough should double in size.
4. Drizzle a sheet pan with ¼ cup olive oil. Transfer the dough and cover with plastic wrap. Set it back in the warm place for another hour. It should double in size again.
5. Preheat the oven to 425F. Using your fingers, press the dough out to evenly fit the sheet pan. Pop any large bubbles and create holes through the dough with your fingertips.
6. Sprinkle with freshly chopped rosemary, thyme, 1 tablespoon of course sea salt, and drizzle with remaining olive oil.
7. Bake for 25 minutes, or until golden brown. Allow to cool slightly, then cut into portions and serve.
Can never go wrong with a classic… . BLOG —> h Can never go wrong with a classic…
.
BLOG —> https://sliceofjess.com/how-to-make-spanish-rice-at-home/
.
INGREDIENTS:
¼ cup Vegetable Oil
2 cups Long Grain Rice
4 Garlic Cloves, minced
3 cups Chicken Stock
15 oz. Tomato Sauce
1 tbsp. Chicken Boullion
1 tsp. Cumin
8 - 10 Cilantro Stems
1 tsp. Salt
Juice of ½ Lime
.
DIRECTIONS:
1. Add the oil to a frying pan over medium-high heat. Sauté the rice until golden brown, about 5 - 8 minutes, then transfer to a large stock pot. Add the minced garlic to the frying pan and cook for 1 minute.
2. Pour in the sautéed garlic, chicken stock, tomato sauce, chicken bouillon, cumin, and mix in the cilantro stems to the rice in the large stock pot. Simmer for 25 - 30 minutes, or until the liquid has absorbed.
3. Remove the cilantro stems and season with salt and lime juice. Add more to taste, if needed. Serve immediately.
Delicious weekend vibes with these Korean Ground C Delicious weekend vibes with these Korean Ground Chicken Nachos. That is all.
.
BLOG —> https://sliceofjess.com/korean-ground-chicken-nachos/
.
FOR THE CHICKEN:
2 tbsp. Sesame Oil
4 Garlic Cloves, minced
1 tbsp. Brown Sugar
2 tbsp. Liquid Aminos
¼ tsp. Ground Ginger
1 lb. @smfchicken Ground Chicken
.
SPICY DRIZZLE:
2 tsp. Sriracha
2 tsp. Mayonnaise
1 tsp. Lime Juice
.
TO ASSEMBLE THE NACHOS:
4 cups Tortilla Chips
8 oz. Monterey Jack, shredded
1 cup Kimchi
Fresh Cilantro, as desired
1 tbsp. White Sesame Seeds
1 tbsp. Red Pepper Flakes, optional
.
DIRECTIONS:
1. Add the ingredients for the chicken to a large skillet. Break apart the meat and sauté until browned and slightly crispy, about 10 - 15 minutes.
2. Meanwhile, whisk together all ingredients for the Sriracha drizzle and set aside in the refrigerator until you’re ready to serve.
3. Preheat oven to 400F. Layer half the tortilla chips, cheese, and kimchi. Repeat a second layer. Bake for 5 minutes, or until cheese has melted.
4. Top with cilantro, sesame seeds, red pepper flakes, and a drizzle of the spicy sauce. Enjoy immediatly.
#mysmfchicken @smfchicken #smfpartner
We’re hosting family for the next few days, so I We’re hosting family for the next few days, so I’ve been cooking up a storm. These Banh Mi Sliders are a fun afternoon app that feeds a crowd. Happy Weekending, friends!
.
BLOG —> https://sliceofjess.com/fully-loaded-lemongrass-banh-mi-burger-sliders/
.
FOR THE GROUND BEEF PATTIES:
• 1 lb. @verdefarms 85/15 Ground Beef
• 4 Garlic Cloves, minced
• 1 tsp. Grated Ginger
• 2 tsp. Lemongrass Purée
• 1 tbsp. Soy Sauce
• Juice + Zest of 1 Lime
• 2 tbsp. Butter
.
FOR THE SLIDERS:
• 6 French Rolls, toasted
• ½ cup Mayonnaise
• 1 tbsp. Habanero Sauce
• Pickled Carrots & Radish, as needed
• ½ English Cucumber, thinly sliced
• ¼ cup Fresh Cilantro, or more if desired
• 2 Jalapeño Peppers, thinly sliced
.
DIRECTIONS:
1. PREP THE SLIDER PATTIES: Mix the ground beef with minced garlic, grated ginger, lemongrass, soy sauce, zest and juice of 1 lime. Divide into six patties and set aside.
2. COOK THE SLIDERS: Add the beef patties to a large skillet over medium heat with a couple tabs of butter. Cook each patty for 4 - 5 minutes, flipping halfway through. I prefer mine medium-well, so the internal temperature should be between 150 - 155F. Toast the buns during this time, if desired.
3. TO ASSEMBLE: Mix the mayonnaise and habanero sauce together in a small bowl. Slather both sides of the toasted slider rolls with the spicy mayo. Then add the cooked patties to each bottom half and top each with pickled carrots, radish, fresh cucumber, cilantro, and jalapeño slices. Top each with second half of the buns and enjoy immediately.
#verdefarms #grassfedbeef #grassfed #organicbeef #thefreshmarket
You can’t live in the south without a yellow squ You can’t live in the south without a yellow squash casserole in your cooking rolodex. This one is my healthier version for spring and summer.
.
BLOG —> https://sliceofjess.com/lightened-up-yellow-squash-casserole/
.
INGREDIENTS:
½ Baguette, sliced and toasted (1 cup crumbled)
½ cup 2% Cottage Cheese
2 tbsp. Olive Oil
1 Yellow Onion, finely sliced
½ Yellow Bell Pepper, minced
2 Garlic Cloves, minced
3 Yellow Summer Squash, sliced into rounds
1 tsp. Salt
1 tsp. Red Pepper Flakes
1 Egg
⅓ cup Shredded Monterey Jack
½ cup Grated Parmesan
2 tbsp. Chopped Italian Parsley
1 tsp. Dried Basil
2 tbsp. Butter, sliced into small chunks
.
DIRECTIONS:
1. Place the toasted baguette in the food processor and pulse until crumbled. Pour out into a bowl and set aside.
2. In the same processor, add the cottage cheese. Pulse until whipped. Place in the refrigerator until you’re ready to use.
3. Add olive oil, onions, and bell pepper to a large skillet over medium-high heat. Sauté until softened, about 5 minutes. Then add the garlic and continue to cook until fragrant, about 1 minute. Remove from the pan.
4. Using the same pan, add the yellow squash rounds. Saute for 10 minutes, or until softened. Then season with salt and red pepper flakes. Mix both the onion mixture and squash in a large baking dish until well combined.
5. Place the whipped cottage cheese in a bowl and mix together with an egg, ¼ cup parmesan, fresh parsley, and dried basil.
6. Fold the cottage cheese mixture and half of the breadcrumbs with the squash in the baking dish. Top with shredded cheese, remaining breadcrumbs, and parmesan. Randomly add small chunks of butter throughout.
7. Bake in a 350F oven for 25 minutes, or until the casserole is set and the top is golden. Serve immediately with fresh parsley for garnish.
I’m a big fan of chickpeas, so finding newish wa I’m a big fan of chickpeas, so finding newish ways to serve them is super fun for me. These North African Chickpea Patties in Spicy Braai Sauce are crunchy on the outside, and have pillowy interior. So good.
.
BLOG —> https://sliceofjess.com/north-african-chickpea-patties-in-spicy-braai-sauce/
.
INGREDIENTS:
1 cup Fonio
15.5 oz. Chickpeas, drained
¼ Yellow Onion
3 Garlic Cloves
¼ cup Italian Parsley Leaves
1 tbsp. Liquid Aminos
1 Habanero Pepper
1 tbsp. Chicken Bullion
1 tsp. Paprika
½ tsp. Salt, or more to taste
Cilantro, for garnish
.
DIRECTIONS:
1. Cook the Fonio according to packaged directions and set aside.
2. Add all remaining ingredients, except for the cilantro, to a large food processor with the cooked Fonio. Pulse until smooth, scraping down the ingredients if needed. Place into the refrigerator for 10 minutes to rest and slightly harden.
3. Oil a baking sheet and form the batter into 15 patties.
4. Bake in a 450F preheated oven for 20 - 25 minutes, making sure to flip halfway through.
5. Garnish with cilantro and serve immediately with Spicy Braai Sauce.
We love this Egg and Avocado Crostini for weekend We love this Egg and Avocado Crostini for weekend brunch. They’re a low-fuss, easy-to-make combo of spring and summer flavors!
.
BLOG —> https://sliceofjess.com/how-to-make-crostini-with-egg-and-avocado/
.
INGREDIENTS: 
1 Baguette
1 tbsp. Olive Oil
3 Eggs
3 tbsp. Milk
1 tbsp. Butter
Salt + Pepper
1 Avocado
1½ tsp. Lemon Juice
½ cup Chopped Tomatoes
½ cup Shredded Parmesan
.
DIRECTIONS:
1. PREHEAT oven to 350° F. Slice baguette into about 16 slices. Lay slices on greased baking sheet; brush tops with olive oil. Bake for about 5 minutes or until lightly browned and toasted.
2. BEAT eggs and milk in bowl until blended. Melt butter in small skillet set over medium-low heat; swirling pan to coat bottom.
3. POUR egg mixture into skillet. As eggs start to cook, push, pull and fold eggs with spatula frequently until all egg is cooked and no liquid remains. Remove from heat. Season with salt and pepper.
4. MASH together avocado, lemon juice and pinch of salt in separate bowl; spoon over slices of baguette to cover most of the surface on top. Spoon scrambled eggs over avocado.
5. TOP with chopped tomatoes and sprinkle with Parmesan.
Happy #NationalGrilledCheeseDay! Happy #NationalGrilledCheeseDay!
Looking for a way to use up all those leftover #ea Looking for a way to use up all those leftover #easter eggs? Some of the BEST recipes are made with the simplest of ingredients. Perfectly boiled eggs are chopped and folded together with mayonnaise, Dijon mustard, celery, jalapeño, green onions, herbs, and spices. Serve it on a toasted waffle for the ultimate sweet & savory experience.
.
BLOG —> https://sliceofjess.com/the-most-delicious-egg-salad-sandwich-recipe/
.
FOR THE EGG SALAD:
• 8 Eggs
• 4 tbsp. Mayonnaise
• 1 tsp. Dijon Mustard
• 1 tsp. Smoked Paprika
• Dash of Garlic Powder
• ½ rib Celery, finely diced
• 1 tbsp. Chopped Green Onions (2 spears)
• ½ Jalapeño, seeded & chopped
• 1 tsp. Chopped Dill
• Salt + Pepper, to taste
.
FOR THE SANDWICH:
• 8 Toasted Waffles (or bread of choice)
• Lettuce, as needed
• Mayonnaise, if preferred
.
DIRECTIONS:
1. Add eggs to a saucepan and fill with cold water. Bring to a boil, cover and immediately turn off the heat. Allow eggs to cook for 10 - 12 minutes.
2. Take the eggs out of the water and place them in an ice bath to stop the cooking process.
3. Peel eggs and cut them in half. Separate the egg yolks and mix them with mayonnaise, dijon mustard, smoked paprika, and garlic powder.
4. Roughly chop the egg whites, jalapeño, celery, green onions and dill. Fold into the yolk mixture. Season with salt and pepper, to taste.
5. Serve egg salad on your favorite waffles or sliced bread with lettuce and additional mayonnaise, if preferred.
Happy Easter Weekend, friends! If you need a quick Happy Easter Weekend, friends! If you need a quick, festive, and easy recipe for entertaining… this is it!
.
BLOG —> https://sliceofjess.com/mini-bacon-onion-quiche-in-phyllo-shells/
.
INGREDIENTS:
30 Mini Phyllo Shells, 1 ½ inches in diameter
3 Eggs
⅓ cup Half and Half
¾ cup Shredded Cheddar Cheese
2 tbsp. Real Bacon Bits
1 tsp. Dried Minced Onion
Fresh Chives, for garnish
.
DIRECTIONS:
1. Place phyllo shells on baking sheet. In a mixing bowl, beat together eggs, half and half, cheese, bacon bits and onion.
2. Spoon 2 teaspoons of filling into each fill-o shell. Bake at 375ºF until quiches puff and turn slightly brown or about 15-20 minutes.
3. Garnish with fresh chives, if desired.
The bird is the word… Heart me some Chicken Picc The bird is the word… Heart me some Chicken Piccata. This here is my air fryer version and it’s freaking spectacular.
.
BLOG —> https://sliceofjess.com/air-fryer-lemon-chicken-piccata/
.
FOR THE CHICKEN:
2 @smfchicken Breasts, sliced in half
1 tsp. Salt
1 tsp. Black Pepper
2 Eggs
1 cup Finely Crushed Cornflakes
3 tbsp. Grated Parmesan
Cooking Spray, as needed
.
FOR THE WHITE WINE SAUCE:
¼ cup Salted Butter
3 Garlic Cloves, minced
2 tbsp. All-Purpose Flour
½ cup Dry White Wine
½ cup Chicken Broth
¼ cup Lemon Juice
3 tbsp. Capers, drained
Fresh Parsley, for garnish
.
DIRECTIONS:
1. Cut the chicken in half, lengthwise. Sprinkle all sides with salt and pepper.
2. Whisk together the eggs in a large bowl and set aside. 3. Crush the cornflakes and mix together with the parmesan in a second bowl. Dip the chicken in the eggs and then the cornflakes - making sure to press down so they’re coated well.
4. Preheat the air fryer to 375F. Spray the interior of the air fryer or the chicken directly so it doesn’t stick. Air fry for 6 - 8 minutes, turning over halfway if needed. Check to make sure the internal temp is 165F.
5. While the chicken is cooking, make the sauce. Melt butter in a sauté pan and then add the garlic. Continue to sauté until fragrant, about 1 minute. Next add the flour and whisk together with the butter until slightly browned.
Pour over the white wine and chicken broth to deglaze. Then add the lemon juice and simmer for 2 - 3 minutes. Finish with the capers and pull off the heat.
6. Plate the chicken with a heavy drizzle of the white wine sauce and garnish with fresh parsley. Enjoy immediately.
Good-for-your-soul-fantastic. Wishing everyone a f Good-for-your-soul-fantastic. Wishing everyone a flavorful weekend!
.
BLOG —> https://sliceofjess.com/lemon-garlic-butter-noodles/
.
INGREDIENTS:
1 lb. Dry Pasta Noodles
½ cup Reserved Pasta Water
1 stick Unsalted Butter
4 Garlic Cloves, sliced
½ Lemon, juiced
1 tsp. Salt, or more to taste
4 tbsp. Fresh Parsley, chopped
.
DiRECTIONS:
1. Cook pasta according to package directions for al dente. Before draining, make sure to reserve at least ½ cup of the pasta water and set aside. Return the pasta to the pot.
2. Slice the butter into smaller pieces and add to the drained pasta. Allow to slightly melt and then add the reserved pasta water, garlic, and lemon juice. Mix until well combined.
3. Taste, and add salt to desired personal preferences. Just before serving, sprinkle with freshly chopped parsley.
Weekend brunch with friends is one of my favorite Weekend brunch with friends is one of my favorite things to host. Serve these Caprese Egg Muffins with a side salad, some crusty bread, and don’t forget the bubbles!🥂
.
BLOG —> https://sliceofjess.com/caprese-egg-muffin-cups/
.
INGREDIENTS:
2 tbsp. Olive Oil
3 cups Baby Spinach
1 cup Cherry Tomatoes, chopped
3 tbsp. Fresh Basil
½ tsp. Salt
½ tsp. Pepper
½ tsp. Garlic Powder
10 Eggs, beaten
36 Fresh Mozzarella Pearls
Aged Balsamic Vinegar, to glaze
.
DIRECTIONS:
1. Preheat oven to 350º and prepare 1 12-cup muffin tin with non-stick cooking spray.
2. In a medium skillet, heat the olive oil over medium heat. Saute the spinach and tomatoes until wilted, then place in a medium bowl. Add the fresh basil, salt, pepper, garlic powder, and eggs. Stir to combine.
3. Use a ¼ measuring cup to divide mixture evenly into the prepared muffin tin. Add 3 mozzarella pearls into each cup.
4. Bake 18 – 23 minutes, until eggs are set.
5. Serve with balsamic glaze. Refrigerate leftovers up to 3 days.
Are you a crispy chicken fan? Go ahead and try the Are you a crispy chicken fan? Go ahead and try them in “hot dog” form! I used @smfchicken chunks, along with sweet & spicy coleslaw, kimchi, fresh herbs, jalapeños, mustard and sriracha on toasty buns. Oh emm gee, turned out fabulous!
.
BLOG —> https://sliceofjess.com/crispy-chicken-korean-bird-dogs/
.
FOR THE BASE:
24 Springer Mountain Farms Chicken Chunks
8 Top Sliced Hot Dog Buns
8 oz. Kimchi
.
SWEET & TANGY SLAW:
3 tbsp. Brown Sugar
1 tbsp. Grated Ginger
⅓ cup Rice Vinegar
2 tbsp. Chili Garlic Sauce
2 tbsp. Dijon Mustard
3 tsp. Sesame Oil
½ tsp. Salt + Pepper
8 oz. Cabbage, thinly shredded
½ Red Onion, thinly sliced
2 tbsp. White Sesame Seeds
.
SUGGESTED TOPPINGS:
1 Jalapeño, sliced
Yellow Mustard, as needed
Sriracha, as needed
⅓ cup Chives, sliced
⅓ cup Cilantro, chopped
.
DIRECTIONS:
1. Bake or air fry the chicken chunks according to packaged directions.
2. While the chicken chunks bake, cut all of the veggies and toppings.
3. Whisk together the brown sugar, ginger, rice vinegar, chili garlic sauce, dijon, and sesame oil in a large bowl. Season with salt and pepper. Next, add the cabbage, red onion, and sesame seeds. Mix to combine.
4. To assemble, add three chicken chunks to each hot dog bun. Then top with coleslaw, kimchi, and desired suggested toppings. Enjoy immediately.
#mysmfchicken #smfpartner
This Mexican Street Corn Salad is perfect for spri This Mexican Street Corn Salad is perfect for spring gatherings, and tastes fantastic with tortilla chips as an app, on toast for breakfast, or in a sandwich for picnics!
.
BLOG —> https://sliceofjess.com/how-to-make-mexican-street-corn-egg-salad/
.
INGREDIENTS:
8 Hard-Boiled Eggs, peeled and coarsely chopped
¼ cup Greek Yogurt
3 tbsp. Mayonnaise
3 tbsp. Lime Juice
1 tsp. Tex-Mex Seasoning
½ tsp. Salt
¼ tsp. Pepper
1 cup Corn Kernels (thawed or lightly cooked)
1 Jalapeño Pepper, seeded and minced
½ cup diced Red Pepper
Green Onions, thinly sliced
¼ cup chopped Cilantro, divided
½ cup Queso Blanco
1 bag Tortilla Chips
.
DIRECTIONS:
1. Combine eggs, Greek yogurt, mayonnaise, lime juice, Tex-Mex seasoning, salt and pepper.
2. Stir in corn kernels, jalapeño, red pepper, green onions and 2 tbsp cilantro. Transfer to serving bowl.
3. Sprinkle queso blanco and remaining cilantro over dip; serve with tortilla chips
With spring right around the corner (ahem, tomorro With spring right around the corner (ahem, tomorrow!), we’re celebrating with these colorful poke bowls. Made in partnership with @pickerfresh, get ready to enjoy savory, sweet, pickled, and spicy all in one place!
.
BLOG —> https://sliceofjess.com/ginger-chicken-poke-bowl-recipe/
.
GINGER CHICKEN:
½ cup Liquid Aminos
1 tbsp. White Miso
2 tsp. Sesame Oil
2 tbsp. Rice Vinegar
2 Garlic Cloves, minced
1 tbsp. Grated Ginger
2 tbsp. Brown Sugar
1 lb. Chicken Breast, cut into chunks
.
TRADITIONAL SUSHI RICE:
2 cups Short Grain Rice
2 cups Water
2 tbsp. Rice Vinegar
1 tsp. Sugar
1 tsp. Salt
.
FOR THE BOWLS:
½ English Cucumber, sliced thin
1 cup Pineapple Chunks, drained
½ cup Kimchi, or as needed
½ cup PickerFresh Pickled Veggie Slaw
4 Green Onions, sliced
1 fresh Jalapeño, sliced
4 tsp. Sesame Seeds, for garnish
8 Lime Wedges, for garnish
1 cup Fresh Cilantro, for garnish
.
SPICY DRESSING:
½ cup Mayo
2 tbsp. Sriracha
3 tbsp. Fresh Lime Juice
.
DIRECTIONS:
1. Prepare all the ingredients for the marinade and cut the chicken into chunks. Remove a ½ cup of the marinade to use after baking and set aside.
2. Simmer the marinade over medium heat for 5 minutes, or until thickened. Making sure to whisk every minute. Pour over the chicken and allow the chunks to marinate for 10 – 15 minutes.
3. Preheat the oven to 375F.
4. While marinating, cook the rice according to package directions, adding the rice vinegar with the water. Once cooked, fluff and mix-in the sugar and salt. Set aside with the lid on to keep warm.
5. Spread the marinated chicken onto a sheet pan and bake for 20 minutes, or until internal temperature is 165F. Once cooked, mix together with reserved marinade and set aside for plating.
6. While the chicken bakes, prepare all of the toppings and whisk together the ingredients for the spicy mayo.
7. To assemble the bowls, place the rice on the bottom. Then top each bowl with chicken, suggested toppings, and a drizzle of spicy mayo. Enjoy immediately.
.
#pickerfreshpartner #sponsored
Load More... Follow on Instagram

Footer

Popular Posts

Blueberry Jam
Homemade Buttermilk Ranch Dressing
Thanksgiving Dressing
Easy Chili Recipe
Whole30 Recipes
Chicken Bacon Ranch Pasta
Copyright Slice of Jess ©2023